Quick Answer
Wheel bearings typically last 85,000 to 100,000 miles (136,000 to 160,000 km) under normal conditions. Common failure modes include rolling contact fatigue (spalling), impact damage (Brinelling), corrosion from seal failure, and lubrication breakdown. Diagnosis requires a systematic approach: customer interview, controlled road test with weave maneuvers at 30 mph and 60 mph, static lift inspection (12/6 and 3/9 o’clock wheel rock), and visual confirmation. A bearing can fail without making noise, and noise often disappears when the vehicle is jacked up – so dynamic testing under load is essential.
A wheel bearing sits at the intersection of the wheel and axle, managing both radial loads from vehicle weight and axial loads generated during cornering and braking. When a bearing starts to fail, the warning signs are often easy to miss – a subtle hum that fades in and out, a hint of looseness in the steering feedback, or an ABS light with no apparent trigger. The wheel hub assembly depends entirely on this bearing to keep the wheel properly aligned and the vehicle stable.
This guide addresses two essential questions: (1) What causes wheel bearings to fail? and (2) How do you systematically pinpoint a failing bearing? We’ll also cover how to separate bearing issues from tire noise, brake problems, and worn CV joints.
Before touching the vehicle, take a few minutes to interview the driver. These four questions will save you time:
- Can you describe the sound? (Deep rumble? High-pitched squeal? Metallic scrape?)
- Does the tone shift with speed? Does it change when you steer?
- Did the vehicle recently strike a pothole, curb, or other road hazard?
- Is the ABS or traction control warning light on?
The answers will point you in the right direction before you even raise the hood.
Common Symptoms Indicating Potential Failure
Audible Clues
A deteriorating bearing typically produces sound as its first warning. Pay attention to:
- Rhythmic chirping, squealing, or growling that speeds up and slows down with the vehicle.
- Noise that only appears within a specific speed range and vanishes outside it.
- A rising pitch as speed increases – the faster the wheels turn, the higher the frequency.
- Sudden snaps, clicks, or pops during turns, which signal that directional loads are aggravating the damaged component.
Handling and Vibration Signals
Noise isn’t the only indicator. A bad bearing changes the vehicle’s behavior:
- Steering feels vague or unresponsive – the wheel doesn’t track as precisely.
- The vehicle drifts or wanders on straight roads, requiring constant corrections.
- The steering wheel shakes at certain speeds or during cornering.
- The wheel itself appears to wobble, shudder, or shimmy when viewed from the side.
- These issues often get worse at specific speeds – typically highway ranges where the damaged bearing resonates.
Visual Clues
A thorough visual inspection can reveal additional evidence:
- Uneven tread wear on just one tire or both tires on the same axle – after ruling out inflation pressure, alignment, or tire defects, this often points to bearing looseness causing the wheel to oscillate.
- Grease residue around the hub surface – a strong indicator that the seal has failed.
ABS Warning Light
Here’s how a failing bearing can fool the ABS system:
- As the bearing wears, the wheel develops lateral movement.
- That movement makes the tone ring (encoder) wobble.
- The wheel speed sensor detects erratic signals.
- The ABS module interprets these as impossible readings – like a wheel going from 60 mph to 0 mph and back instantly – and triggers the warning light.
Important: A pothole strike in winter might not cause an ABS alert until months later – the damage progresses gradually. Retrieving diagnostic trouble codes (DTCs) with a scan tool can verify whether the ABS warning is bearing-related or an electrical issue.
Differentiating Bearing Noise from Other Sources
Many components can produce wheel-area noises. Here’s a quick reference:
| Noise Source | Key Characteristics |
|---|---|
| Tire noise | Varies with speed but remains unchanged during turns; also changes with tire brand, tread pattern, and pressure |
| Brake noise | Appears only when the brake pedal is pressed; typically fades or shifts when you apply light brake pressure |
| CV joint noise | Produces clicking or popping as you steer, with volume increasing as the steering angle sharpens |
| Suspension bushing noise | Can transmit vibration into the cabin, but generally doesn’t follow the speed-dependent or turn-dependent patterns of bearing failure |
Main Failure Modes and Root Causes
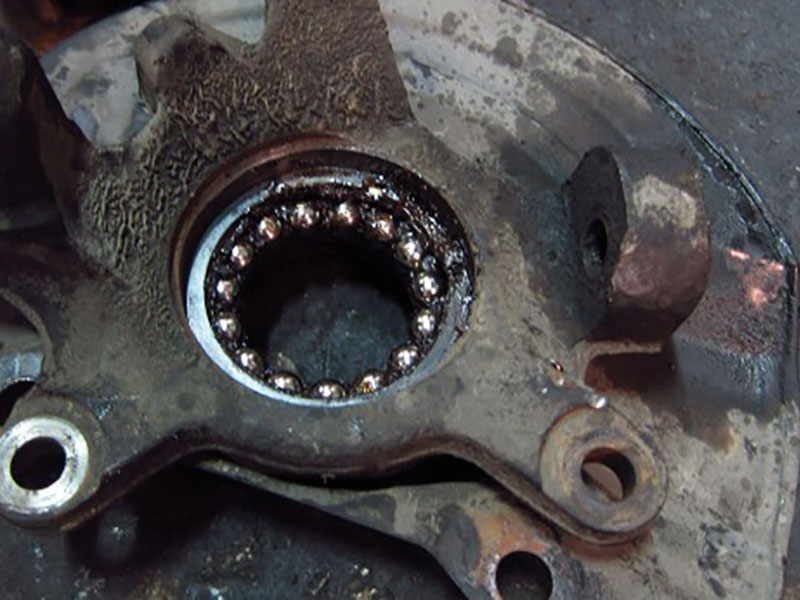
The mechanisms behind bearing failure fall into several distinct categories. Recognizing which one applies helps you understand whether the failure was inevitable or could have been prevented.
Rolling Contact Fatigue (Spalling)
Spalling is the natural end-state of a bearing that has reached its service limit. Under typical operating conditions, a sealed hub unit will deliver about 85,000 to 100,000 miles of service. Over countless rotation cycles, microscopic cracks initiate on the raceways and rolling elements. These cracks eventually cause chips of metal to detach – a condition known as fatigue spalling. The same cracking pattern can also appear when a bearing has been subjected to severe overloading or misalignment.
Impact Damage (Brinelling)
When a vehicle encounters a pothole, curb, or debris, the impact force travels through the tire, wheel, and hub directly into the bearing. If that force exceeds what the bearing steel can withstand, it leaves a permanent indentation – a Brinell mark – on the races or rolling elements.
Important nuance: These marks often remain silent for 1,000 miles or more after the initial impact. The driver may notice nothing unusual for weeks or months. But with every rotation, those dents generate stress concentrations and release microscopic debris into the lubricant, progressively destroying the bearing from within.
Corrosion and Contamination
Seal integrity is the single most important factor in bearing longevity. Once the seal fails, water, mud, salt, and grit have direct access to the bearing interior. Moisture degrades the grease, and abrasive particles lap away at the highly polished bearing surfaces.
What follows is a self-perpetuating cycle:
- Seal failure → moisture and debris enter
- Debris accelerates wear → more metal particles break loose
- Those particles further damage the seal → more contaminants enter
- The cycle continues until the bearing fails completely
In regions where road salt is heavily used, the corrosive effect rivals that of seawater, rapidly accelerating the process.
Lubrication Failure and Overheating
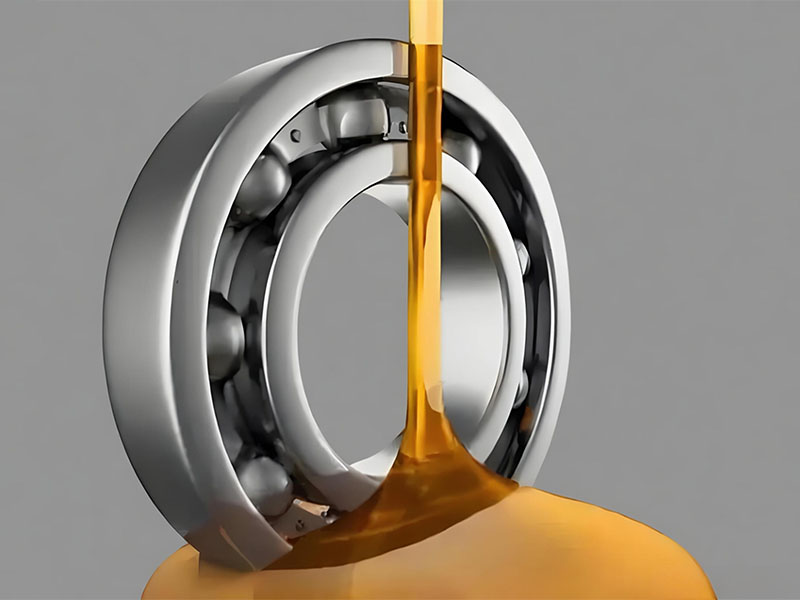
Grease doesn’t last forever. Heat and contamination break it down over time. When the lubricant degrades or leaks out, metal surfaces come into direct contact. The resulting friction drives temperatures up, often leaving components with a blue discoloration – a telltale sign of extreme heat. This overheating can cause smearing or adhesive wear on roller ends, and eventually, the bearing seizes or breaks apart.
Professional Troubleshooting Workflow
Knowing how bearings fail is useful – but knowing how to find a failing bearing is the skill that separates a good technician from a great one. The following four-step process gives you a practical, repeatable method for accurate diagnosis.
Step 1: Customer Interview and Test Drive Preparation
Start with the driver’s account:
- When did you first notice the issue?
- Did it come on suddenly or gradually?
- Did anything specific – like hitting a pothole or curb – happen around that time?
Always conduct the test drive on a smooth, level road to eliminate tire noise as a variable. Turn off the radio, fan, and any other accessories that might mask subtle sounds.
Step 2: Dynamic Road Test
This step is non-negotiable because bearings only reveal their condition when they’re under load.
Speed check: Listen for noise at approximately 50 km/h (30 mph) and again at 100 km/h (60 mph). Light damage may produce noise at only one of these speeds.
Neutral coast: Shift to neutral while driving to isolate bearing noise from engine, transmission, or differential sounds.
The weave test (the single most reliable diagnostic maneuver): At a steady speed, steer left and right – about 45 degrees of wheel input in each direction. This alternates the load between the left and right bearings.
The rule you’ll use every time:
- More noise when steering left → right bearing is the problem
- More noise when steering right → left bearing is the problem
The explanation: turning left shifts vehicle weight to the right, increasing the load on the right bearing. A damaged bearing always gets louder under heavier load.
Slow-speed weave: At speeds around 30 mph or less, weave gently within your lane. This often makes a bad bearing more vocal.
Critical caution: If you raise the vehicle and spin the wheel by hand, you may hear absolutely nothing. Most failing bearings only produce noise when supporting the vehicle’s full weight. A quiet spin test proves nothing.
Step 3: Static Lift Inspection
Once the road test confirms a bearing issue, lift the vehicle for physical inspection.
12-and-6 rocking test: Hold the tire at the top (12 o’clock) and bottom (6 o’clock) and push-pull firmly. This tests for radial play (vertical movement). Rocking at 12 and 6 bypasses steering linkage slop, giving you a cleaner reading of bearing condition.
3-and-9 rocking test: Hold at the side positions (3 and 9 o’clock) to check for axial play (horizontal movement).
Critical distinction:
- Sealed hub units should have zero detectable play. Any movement means replacement is required.
- Serviceable (adjustable) taper bearings may permit a small amount of play – always verify against the vehicle manufacturer’s specification.
Spin the wheel: Rotate it by hand and feel for roughness, binding, or grinding. Listen closely for any internal noise.
Step 4: Visual Confirmation Before Disassembly
Before pulling components apart, inspect these areas:
- ABS tone ring and sensor: Look for metallic debris stuck to the sensor tip or damage to the tone ring teeth. A scan tool can retrieve DTCs to help distinguish bearing-induced ABS alerts from electrical malfunctions.
- Seal condition: Check for tears, gaps, or complete absence of the seal. A compromised seal is how contamination enters.
- Rust at press-fit interfaces: Corrosion where the bearing contacts the knuckle can indicate incompatible greases or insufficient lubrication during assembly.
- Raceway scoring: If visible, look for dent marks or linear scoring that confirm impact damage.
Conclusion
Accurate wheel bearing diagnosis combines multiple techniques – driver interview, load-based road testing, static play checks, and visual evidence. No single method is sufficient on its own; each step narrows the possibilities until the faulty component is clearly identified.
Keep these takeaways in mind:
- Impact damage can take 1,000+ miles to become audible.
- A bearing can fail without producing any sound at all.
- Silence on the lift doesn’t mean the bearing is good – bearings need vehicle weight to show their true condition.
- Sealed hub bearings should have no detectable movement – the zero-play rule is your guide.
- DTCs from a scan tool add confirmation, especially when the ABS light is involved.
Bearing quality matters. Components manufactured to tight tolerances with properly controlled heat treatment develop surface hardness that resists Brinelling from impact. When replacement becomes necessary, selecting a bearing that can handle real-world road conditions reduces the likelihood of premature failure and eliminates the risk of costly comeback repairs.
FAQs
Q1: How do I know if it’s the wheel bearing or just tire noise?
A: Tire noise changes with speed but not with steering input. Bearing noise typically intensifies or changes tone when you turn because turning alters the load on the bearing. Additionally, tire noise varies with tread design and inflation pressure, while bearing noise has a consistent mechanical character.
Q2: Why does bearing noise get louder when I turn one direction?
A: When you turn left, the vehicle’s weight shifts to the right side, placing additional load on the right bearing. A damaged bearing becomes louder under extra load. Louder on left turns → right bearing is bad. Louder on right turns → left bearing is bad.
Q3: Can a wheel bearing be failing without making any sound?
A: Yes. Many bearings generate vibrations, steering instability, brake pedal pulsation, or ABS warning lights with zero audible warning. The “listen for noise” approach only catches bearings already in advanced stages of failure.
Q4: What does a failing bearing actually feel like while driving?
A: Typical sensations include vague or loose steering, a shaking steering wheel at highway speeds, constant correction to stay in lane, or a wobbling sensation from the wheel area. These symptoms often appear within specific speed ranges where the damaged bearing resonates.
Q5: Can one pothole instantly destroy a wheel bearing?
A: The impact can create Brinell marks – permanent indentations – in the bearing races. However, you may drive 1,000 miles or more before those dents generate noticeable noise. The damage occurs immediately; the noise takes time to develop.
Q6: Why does the bearing noise vanish when the car is lifted?
A: Because bearings need weight to show their condition. When lifted, the bearing is unloaded and may rotate smoothly and silently. This is completely normal – it doesn’t indicate a good bearing. The noise reappears only under the vehicle’s full weight.
Q7: Can a wheel bearing activate the ABS warning light?
A: Yes. A loose bearing lets the wheel wobble, making the tone ring (encoder) move erratically. The wheel speed sensor picks up irregular signals, and the ABS module interprets them as physically impossible readings, triggering the warning light. The failure may surface months after the original impact. A scan tool can read diagnostic trouble codes (DTCs) to help confirm the diagnosis.