Quick answer: A tensioner or idler pulley needs replacement when you notice any of these 8 signs: side-to-side movement (rock), misalignment, visible cracks or damage, free spinning (more than 2 rotations by hand), seized bearings, heat discoloration (blue/brown marks), surface debris build-up, or excessive groove wear. Most manufacturers recommend inspecting the belt drive system at 60,000 miles and replacing pulleys along with the belt at 90,000 miles. Failing pulleys often produce chirping, whining, or grinding noises.
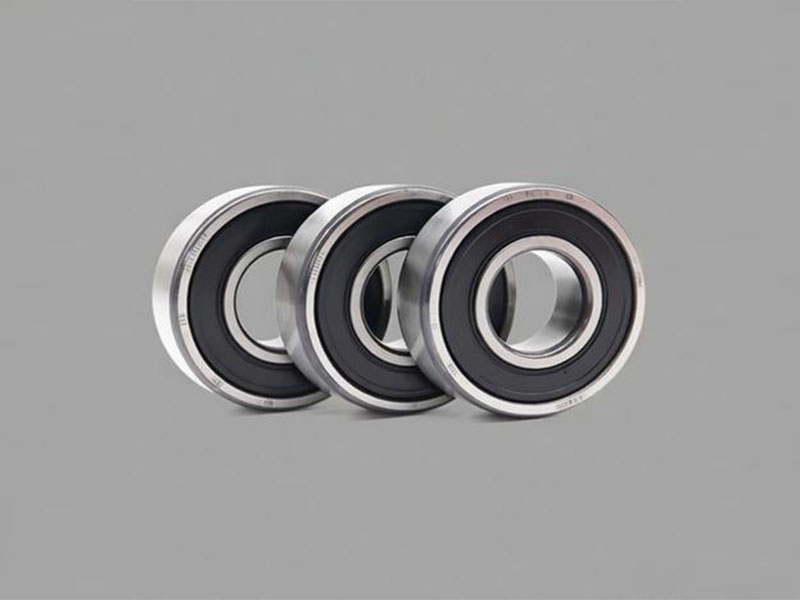
The accessory belt drive system in a vehicle relies on a set of pulleys to keep the serpentine belt operating correctly. Among these components, the idler pulley and the tensioner pulley play distinct but equally important roles. A common question among vehicle owners and technicians is: when should the tensioner pulley or idler pulley be replaced? Bearing wear is the most frequent cause of pulley failure in both types. When a pulley bearing begins to deteriorate, the driver may notice unusual noises, belt misalignment, or visible damage on the pulley surface. Recognizing these warning signs early can prevent more serious issues, including belt failure and loss of power to critical engine accessories.
The Difference Between Idler Pulleys and Tensioner Pulleys
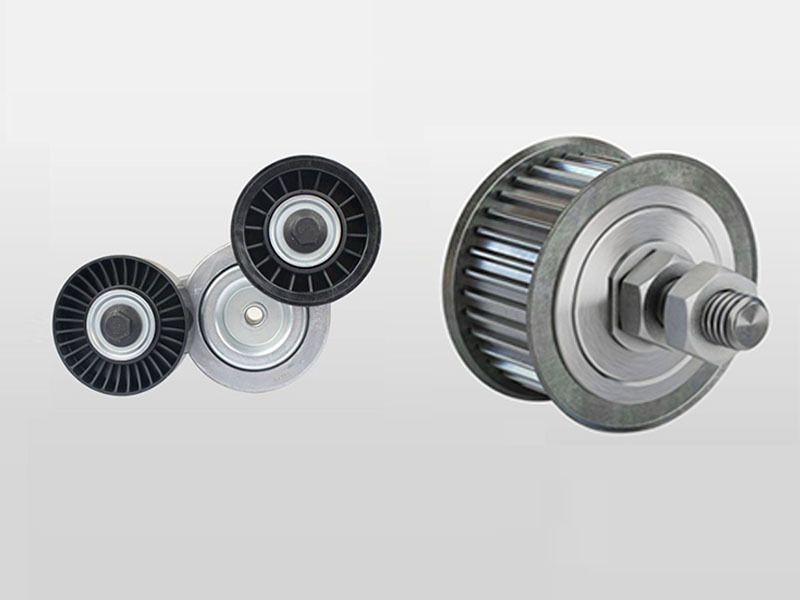
Idler Pulley
An idler pulley is a fixed-position pulley that mounts directly to the engine block or bracket using a bolt. It serves as a guide for the drive belt, ensuring that the belt follows the correct path around engine accessories such as the alternator, air conditioning compressor, power steering pump, and water pump. The idler pulley also increases the belt’s wrap angle around driven pulleys, which improves power transmission efficiency. An idler pulley does not provide any tensioning force and has no automatic adjustment capability. It simply rotates on a bearing to allow the belt to pass smoothly.
Tensioner Pulley
A tensioner pulley is part of a larger tensioner assembly that includes a spring-loaded arm or hydraulic actuator, a pivot mechanism, and the pulley itself. The primary function of the tensioner pulley is to apply constant pressure to the drive belt, maintaining proper belt tension at all times. As the belt stretches and wears over time, the tensioner automatically adjusts its position to compensate for the slack, keeping the belt tight and properly aligned. The tensioner pulley is mounted on a movable arm that swings in response to belt conditions.
Key Distinguishing Features
The most fundamental difference between the two pulley types lies in their ability to adjust tension. An idler pulley cannot adjust tension; it serves only as a fixed guide for the belt. A tensioner pulley, by contrast, actively applies and maintains tension through a spring or hydraulic mechanism.
Installation also differs. An idler pulley uses a fixed round hole and is clamped in place with a bolt. A tensioner pulley is mounted on a base with an elongated slot or a pivoting arm, which allows the pulley to move through a range of motion.
The consequences of failure are also different. When an idler pulley bearing fails, the result is typically noise and belt wear. When a tensioner fails—whether due to spring fatigue, arm seizure, or bearing wear—the entire belt drive system can lose tension, leading to belt slippage, persistent squealing, and potential loss of power steering or alternator charging.
Replacement strategy is another point of distinction. An idler pulley can usually be replaced as a standalone component. However, for a tensioner pulley, replacing the entire tensioner assembly—including the spring arm and pulley—is strongly recommended because the spring and pivot components wear out over time and cannot be serviced separately.
How to Tell If Your Tensioner or Idler Pulley Needs Replacement: 8 Signs
The following signs indicate that an idler or tensioner pulley may need replacement. These symptoms apply to both pulley types unless otherwise noted.
- 1. Rock — With the belt removed and engine off, rock the pulley back and forth by hand. There should be no noticeable side-to-side movement or play. Any detectable lateral movement indicates bearing wear and the need for replacement.
- 2. Misalignment — When a pulley becomes misaligned, the belt does not track properly across the pulley surface. Misalignment is often caused by worn bearings or a damaged tensioner arm. It typically produces a chirping noise and can lead to accelerated belt wear.
- 3. Cracked or Broken Pulley — A visual inspection may reveal obvious physical damage such as cracks, chips, or breakage in the pulley body. Plastic pulleys are particularly prone to cracking around the sidewall flanges. Any visible structural damage warrants immediate replacement.
- 4. Free Spinning — After removing the belt, spin the pulley with your fingers and observe how many revolutions it makes before stopping. A healthy pulley should spin smoothly for one or two rotations and then come to a stop. If the pulley spins too freely—continuing for many revolutions—this indicates that the internal grease has dried out. The bearing will soon fail.
- 5. Seized Bearings — A pulley that does not rotate at all, or rotates with significant resistance, has seized bearings. Continued operation with a seized pulley can shred the drive belt and damage other components.
- 6. Discoloration — Heat discoloration, often appearing as blue or brown marks on the pulley surface, is caused by intermittent bearing seizure or belt slippage resulting from a faulty tensioner. Overheating accelerates bearing wear and indicates an underlying problem.
- 7. Surface Build-up — Accumulation of belt material or debris on the pulley working surface is a key indicator of belt slippage. This condition is most often caused by a worn-out tensioner that can no longer maintain adequate belt tension.
- 8. Excessive Wear — Grooves that have become deeper than specified or pulley edges that have become thin indicate excessive wear. This condition is more common on vehicles operated in dusty environments, where abrasive particles accelerate pulley and belt wear.
How to Diagnose Pulley Problems by Noise
Different types of noises point to different underlying issues in the belt drive system.
Chirping or Squeaking — A high-pitched chirping sound, often heard once per revolution of a pulley, typically indicates pulley misalignment or a slipping belt. Misalignment can result from worn bearings or a damaged tensioner arm. The water spray test is a useful diagnostic method: with the engine running, spray a small amount of water onto the belt. If the chirping noise temporarily stops and then returns, the issue is likely belt-related. If the noise persists, the problem is more likely to be pulley misalignment.
Whining or Hooting — A whining noise that rises and falls with engine RPM often points to a bearing that is running dry. This sound may be present immediately after engine start-up and can last for several minutes before diminishing. As the bearing deteriorates further, the whine may evolve into a rough grinding sound.
Grinding or Rattling — A grinding noise indicates advanced bearing wear or seizure. When the bearing begins to break down internally, metal components may contact each other, producing a harsh sound. A rattle may also occur if the tensioner arm has excessive play or if the pulley mounting is loose. A healthy tensioner does not produce squeaks, rattles, chirps, or churning noises under normal operation.
Using a Stethoscope — To pinpoint the source of a noise, a mechanic’s stethoscope can be placed against the mounting bolt of each pulley while the engine is running. The pulley that produces the loudest noise is typically the faulty component.
How to Inspect Pulleys Without Disassembly
Several simple checks can help determine whether a pulley is failing, without removing any components.
Cold Start Listening — Start the engine in a quiet environment and listen from the front of the engine bay. Any abnormal noise coming from the belt drive area should be noted. The noise pattern—whether it changes with engine RPM or under accessory load—provides diagnostic clues.
Manual Rotation Test (Engine Off) — With the engine turned off and the belt removed, rotate each pulley by hand. A healthy pulley should turn smoothly with consistent resistance and no rough spots. Listen for any grinding or scraping sounds during rotation.
Side-to-Side Rock Test — Grasp the pulley with your fingers and attempt to rock it laterally. Any play or movement indicates bearing wear. For tensioner assemblies, also check whether the tensioner arm moves smoothly through its full range of motion when manually rotated.
Visual Inspection for Grease Leakage — Examine the area around the bearing seal for signs of grease leakage. Brown or red dust around the pulley bearing is a sign that the seal has failed and lubrication is escaping. Any visible grease leakage means the bearing should be replaced.
Observe While Engine Idles — With the engine running at idle, watch the tensioner arm and pulleys. Excessive movement or belt flutter indicates insufficient tension or worn components. Also check whether the belt is running near the center of each pulley; belts that ride near the edge may indicate misalignment.
Preventive Maintenance for Idler and Tensioner Pulleys
Recommended Inspection and Replacement Intervals
Many vehicle manufacturers recommend a thorough inspection of the belt drive system around 60,000 miles (approximately 100,000 kilometers). At this mileage, belts, tensioners, and pulleys should be checked for wear, noise, and proper alignment. Full replacement of the belt, tensioner, and idler pulleys is typically recommended around 90,000 miles (approximately 150,000 kilometers).
Replace as a System
The accessory belt drive components—belt, tensioner assembly, and idler pulleys—are designed to wear together. Replacing only the belt while leaving a worn tensioner or worn pulleys in place often results in shortened belt life. The existing tensioner may have weakened springs that cannot provide adequate tension, and worn pulley bearings can cause misalignment that accelerates belt wear. Installing a complete set of components at the same time is the most reliable approach to ensure another full service interval of trouble-free operation.
Replace Pulleys When Replacing the Belt
The industry-recommended practice is to replace idler pulleys and the tensioner assembly whenever the drive belt is replaced, and conversely to replace the belt whenever pulleys are replaced. This systems-based approach prevents the situation where a new belt fails prematurely due to worn supporting components.
Full Tensioner Assembly Replacement
When a tensioner pulley fails, replacing the entire tensioner assembly rather than just the pulley itself is strongly recommended. The spring mechanism and pivot components wear over time and cannot be serviced individually. Installing only a new pulley on an old tensioner body leaves the weakened spring and worn pivot in place, which will likely lead to continued performance issues or early failure of the new pulley. Accessory drive components are designed to wear together, and skipping the tensioner replacement can result in belt failure within a few weeks.
Conclusion
Recognizing when an idler pulley or tensioner pulley needs to be replaced is important for maintaining the reliability of the accessory belt drive system. The eight symptoms described—rock, misalignment, visible damage, free spinning, seized bearings, discoloration, surface build-up, and excessive wear—provide clear indicators for replacement decisions. Idler pulleys and tensioner pulleys serve different functions, but both rely on sealed bearings that wear over time. The tensioner assembly, which includes a spring or hydraulic mechanism in addition to the pulley, should be replaced as a complete unit rather than attempting to replace only the pulley. Preventive replacement of pulleys and tensioners at approximately 90,000 miles, together with the drive belt, follows the systems-based approach recommended by component manufacturers and automotive professionals. Regular inspection using the DIY methods described can help identify potential issues before they lead to belt failure or loss of accessory function.
Frequently Asked Questions (FAQs)
Q1: Can idler pulleys and tensioner pulleys be interchanged?
A1: No. Idler pulleys typically have a fixed round mounting hole and are clamped in place. Tensioner pulleys are mounted on a base with an elongated slot or are attached to a movable arm that allows for adjustment. The two designs are not interchangeable. Always use the component specified for the vehicle application.
Q2: Is it acceptable to replace only one pulley to save cost?
A2: Replacing only one pulley is not recommended from a long-term reliability perspective. Idler pulleys and tensioner pulleys have similar service lives. When one begins to fail, the other is typically approaching the end of its useful life as well. Replacing only one component may lead to the need for another repair in the near future, potentially resulting in higher total labor and parts costs over time.
Q3: How is belt tension safely released for pulley replacement?
A3: Use a wrench or a specialized tensioner tool inserted into the square or hexagonal drive on the tensioner body. Rotate the tensioner in the direction that releases tension from the belt—clockwise or counterclockwise depending on the vehicle. While holding the tensioner in the released position, remove the belt from the pulleys. After replacing the target pulley, route the new belt according to the belt routing diagram for the vehicle, then slowly release the tensioner to apply tension. Confirm that the belt is properly seated in all pulley grooves and that the tensioner pointer falls within the specified wear range, if equipped.
Q4: Can grease be added to a worn pulley bearing?
A4: No. Idler and tensioner pulley bearings are sealed, maintenance-free components. They are not designed to be lubricated, and there is no access point for adding grease. Once a bearing begins to make noise or spins too freely, the grease inside has either dried out or leaked past a failed seal. The only correct solution is to replace the entire pulley assembly.
Q5: What tools are needed to replace a pulley?
A5: The following tools are typically required: a wrench or tensioner release tool sized for the vehicle’s tensioner hex or square drive; a socket set with the appropriate size for the pulley mounting bolts; a torque wrench to tighten bolts to manufacturer specifications; a belt routing diagram or reference image; and optionally a mechanic’s stethoscope for noise diagnosis before disassembly.
Q6: How can a technician distinguish between belt noise and pulley bearing noise?
A6: A mechanic’s stethoscope can be used to listen to each pulley while the engine is running. Place the probe against the mounting bolt of each pulley. The pulley producing the loudest noise is the source of the problem. Alternatively, with the engine off and belt removed, rotate each pulley by hand. A rough or grinding feel indicates bearing wear. The water spray test also helps isolate belt-related noise: spraying water on the belt temporarily silences belt-related squeal but has no effect on bearing noise.
Q7: Is a small amount of pulley movement normal?
A7: No. Any detectable side-to-side movement when the pulley is rocked by hand indicates that the bearing has wear and should be replaced. When the engine is running, a visual inspection may reveal wobbling that is not apparent with the engine off. If movement is observed during operation, further inspection is required.
Q8: If a new pulley still produces noise after replacement, what could be wrong?
A8: Possible causes include: the new pulley itself may be defective; the tensioner assembly may be worn and requires full replacement rather than just the pulley; the belt may be incorrectly routed or misaligned; the belt itself may be old or damaged; or another pulley in the drive system, such as an alternator or power steering pump pulley, may be failing and producing noise. A systematic inspection of the entire belt drive system, including all pulleys and the tensioner assembly, is recommended to identify the root cause. If the tensioner arm shows excessive play or the tensioner spring has weakened, replacing the entire tensioner assembly is the appropriate solution.