Quick Answer
To replace an insert bearing, isolate the machine, support the shaft, remove the locking hardware, take out the old bearing, clean and inspect the shaft and housing, install the correct replacement bearing, lock it according to its design, lubricate where required, and test run at low speed. Exact steps depend on locking method, housing type, shaft condition, and manufacturer procedure.
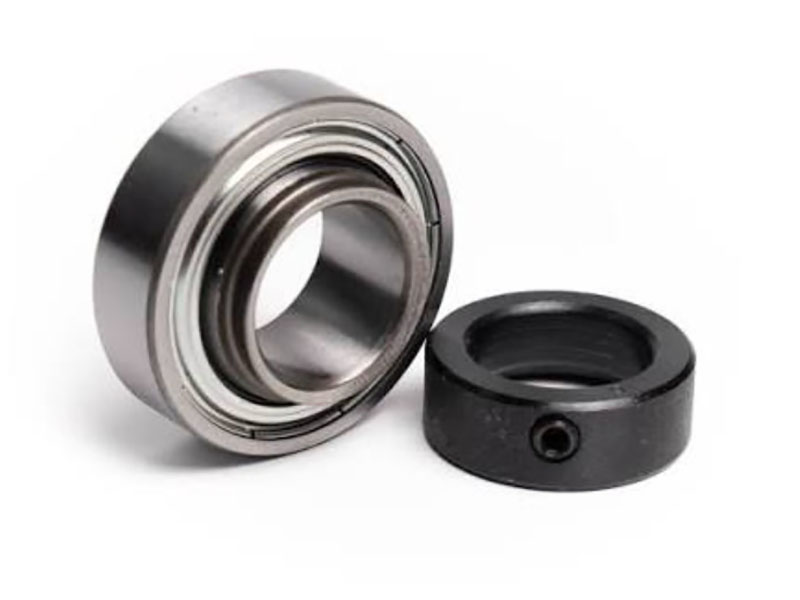
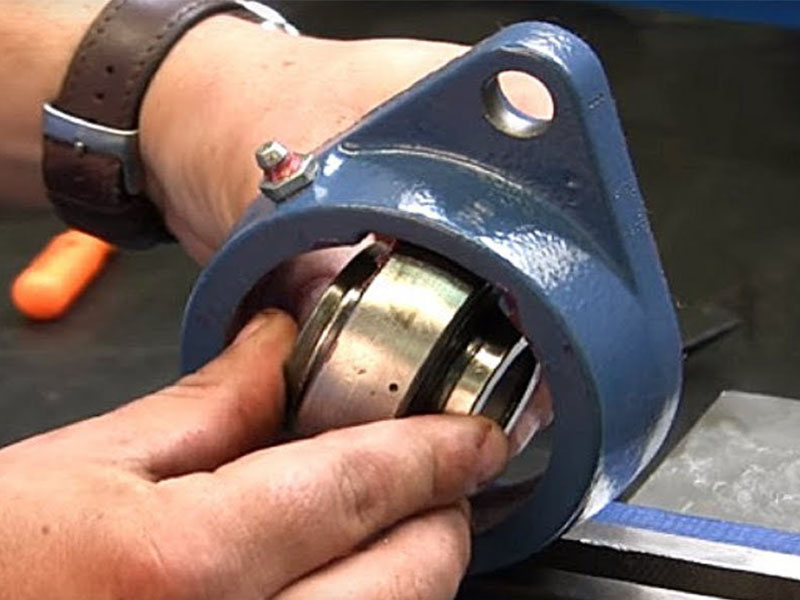
How to replace an insert bearing depends on the bearing unit design. Many insert bearings used in mounted units have a spherical outside diameter that permits initial alignment in a matching sphered housing. This feature does not correct substantial shaft or mounting misalignment during operation.
Replacement looks simple, but poor shaft cleaning, wrong locking method, hammer damage, misalignment, or incorrect lubrication can shorten bearing life. Use the equipment manual and bearing supplier instructions for the exact part.
Before Replacement: Safety And Identification
Before any work, stop the machine, isolate power, and prevent accidental startup. Support the shaft and connected parts so the bearing is not carrying uncontrolled weight during removal.
- Confirm bearing number, housing type, bore size, seal type, and locking method.
- Check whether the insert uses set screws, eccentric locking collar, adapter sleeve, or another locking design.
- Prepare puller, wrenches, cleaning tools, lubricant, and suitable installation tools.
- Inspect surrounding guards, belts, pulleys, couplings, and fasteners.
Remove The Old Insert Spherical Bearing
- Clean the exposed shaft area so dirt does not enter the bearing seat.
- Loosen the locking device according to the bearing design.
- Remove housing bolts or release the insert from the housing if the design allows separate removal.
- Use a puller or suitable removal method to slide the bearing from the shaft.
- Avoid striking the bearing directly in a way that damages the shaft, housing, or surrounding parts.
If the bearing is seized, identify the cause before forcing removal. Rust, fretting, shaft burrs, heavy load marks, or a damaged locking collar can make removal difficult.
Inspect Shaft, Housing, And Related Parts
Replacement is not complete if the new bearing is installed on a damaged shaft or in a distorted housing. Inspect the shaft for scoring, corrosion, undersize wear, burrs, and poor roundness. Check the housing seat for cracks, deformation, dirt, and mounting surface damage.
Also inspect seals, grease paths, covers, belts, pulleys, and alignment. A failed bearing may be the result of contamination, overloading, misalignment, poor lubrication, or improper locking rather than normal wear. Replace a bearing with damaged raceways or rolling elements; do not grind those working surfaces for reuse.
Install The New Insert Bearing
- Confirm the replacement bearing matches the original specification.
- Clean the shaft and apply lubricant or anti-corrosion protection only where the procedure allows it.
- Slide the bearing into position without damaging the seals or rolling elements.
- Align the housing with the shaft and mounting surface before tightening fasteners.
- Lock the bearing to the shaft using the specified method.
- Lubricate the bearing if it is a relubricatable design and the specification requires grease.
- Do not heat a sealed insert bearing unless its manufacturer specifically permits heating and provides a method and limit.
- Rotate the shaft by hand where possible to check for binding or abnormal resistance.
Locking Method Considerations
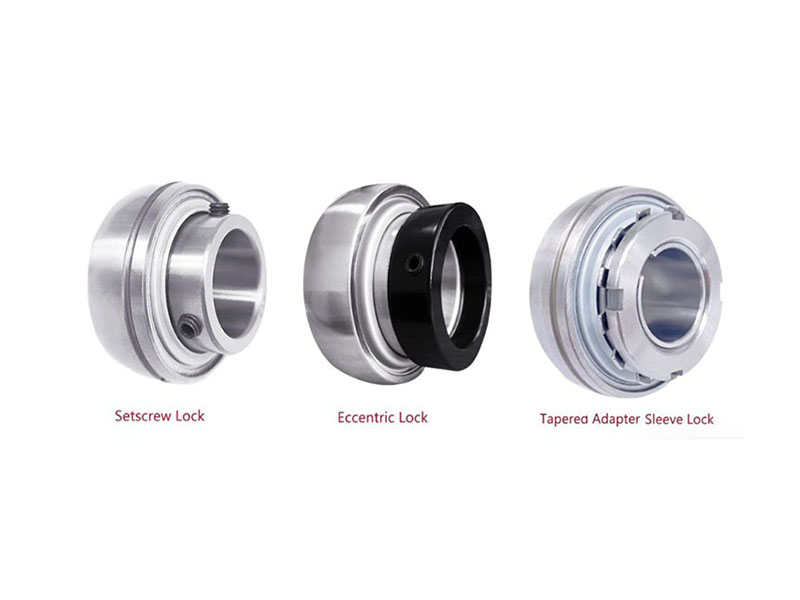
Set screw locking, eccentric collar locking, and adapter sleeve locking are not installed the same way. Each method has its own tightening sequence and torque requirement. Do not guess torque values from bearing size alone.
For set screw designs, tighten the specified screws in the manufacturer’s sequence and to the stated torque. For eccentric collar designs, collar direction and locking rotation matter. For adapter sleeve designs, correct seating and any required clearance check are important. Follow the bearing manufacturer’s procedure.
Test Run And Final Checks
After installation, run the machine at low speed where safe and observe noise, vibration, temperature, and seal condition. Stop the machine if abnormal heat, looseness, rubbing, or noise appears.
Recheck fasteners and guards after the initial run if the equipment procedure requires it. A correctly installed insert bearing should run smoothly, stay aligned, and retain lubrication without seal damage.
Common Replacement Mistakes
- Installing the wrong bore size or locking type
- Failing to clean shaft burrs before installation
- Hammering through rolling elements
- Overtightening or undertightening locking screws
- Ignoring shaft wear or housing distortion
- Using incompatible grease or skipping required lubrication
- Running the machine before guards and fasteners are secure
Conclusion
Replacing an insert bearing requires correct identification, clean removal, careful inspection, proper installation, correct locking, and final testing. The safest result comes from following the bearing and equipment manufacturer’s procedure instead of relying on a generic shortcut.
FAQs
Q1: Can I hammer an insert bearing onto the shaft?
A: Direct hammering can damage seals, rolling elements, rings, or the shaft. Use suitable mounting tools and apply force only through the correct surfaces according to the procedure.
Q2: Why does a new insert bearing fail quickly?
A: Common causes include wrong part selection, shaft wear, misalignment, contamination, poor lubrication, incorrect locking, overload, or housing damage.
Q3: Do all insert bearings need grease?
A: No. Some insert bearings are factory-lubricated and not designed for relubrication, while others are relubricatable. Follow the bearing specification and equipment maintenance schedule.
Q4: How do I know the locking method?
A: Check the bearing number, collar design, set screws, sleeve arrangement, and supplier catalog. Do not install different locking types using the same method.
Q5: What is the difference between set screw and eccentric collar locking?
A: Set screw designs lock the inner ring directly to the shaft with specified screws. Eccentric collar designs use mating eccentric surfaces and a collar that is rotated in the locking direction before its screw is secured. Each design requires its own sequence and torque information.
Q6: Can the existing bearing housing be reused?
A: It may be reusable when the mounting base, bolt holes, sphered seat, lubrication path, and housing body remain within the equipment and bearing manufacturer’s requirements. Replace a housing that is cracked, distorted, heavily worn, corroded at a critical seat, or unable to retain the insert correctly.
Q7: Why does an insert bearing bind after the housing bolts are tightened?
A: Possible causes include a distorted or uneven mounting surface, misaligned housings, an incorrectly positioned shaft, excessive axial constraint, contamination in the housing seat, or the wrong insert. Loosen and inspect the assembly rather than operating a bearing that does not rotate correctly.
Q8: Should the shaft be polished before installing an insert bearing?
A: Remove dirt and harmful burrs using a method permitted by the equipment procedure, but do not reduce the shaft diameter or hide serious wear. Measure and inspect a grooved, corroded, out-of-round, or undersize shaft and repair or replace it as required.
Q9: Can a sealed insert bearing be heated for installation?
A: Only when the bearing manufacturer specifically permits heating and provides an approved method and temperature limit. Uncontrolled heating can damage seals, lubricant, heat treatment, or locking components. Many mounted insert bearings are intended to slide onto a correctly specified shaft without generic heating.