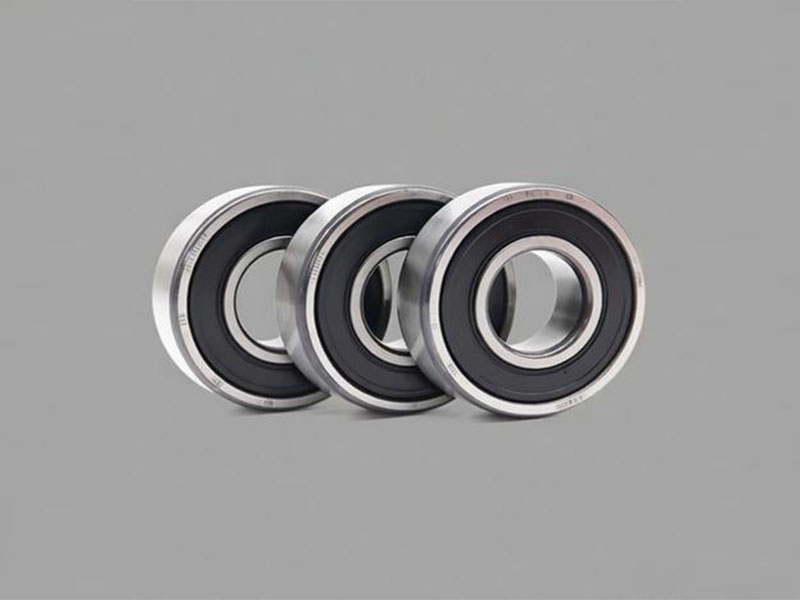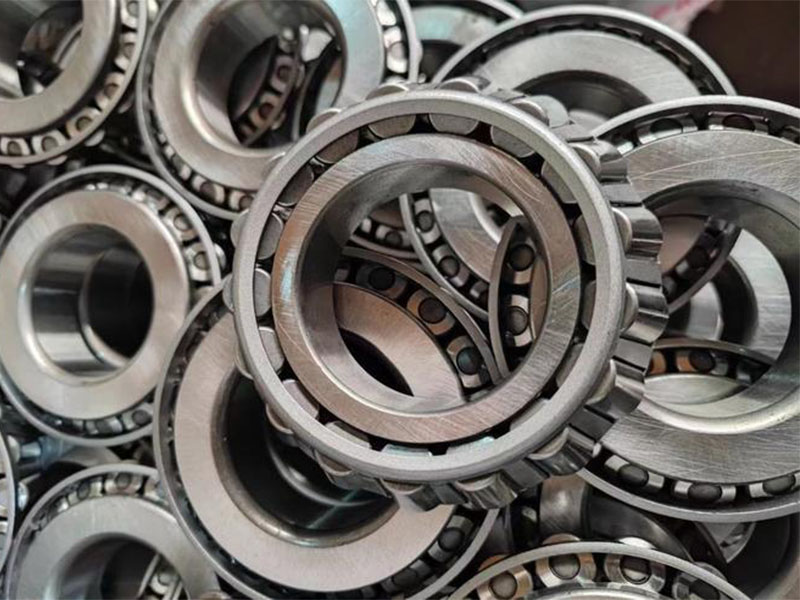
Quick Answer
A pillow block bearing is a self-contained mounted unit that supports rotating shafts in industrial and automotive equipment. A correct installation follows this sequence: clean and inspect the shaft, slide bearings into place, loosely bolt housings, align the shaft and housings, fully tighten all mounting bolts, verify free axial shaft movement, and torque set screws to the manufacturer’s specified values. For systems with an expansion bearing, secure the fixed bearing first. Base flatness is critical – 0.002 inches per foot is the maximum recommended deviation, and 0.010 inches can cut bearing service life by more than half.
From the DUHUI Bearing engineering team. DUHUI Bearing has been producing IATF 16949-certified bearing solutions for automotive and industrial customers worldwide since 2003. Our field failure analysis shows that more than 60% of premature bearing failures come from installation errors – not from manufacturing defects. This guide captures what we have learned from thousands of real-world installations.
What Is a Pillow Block Bearing?
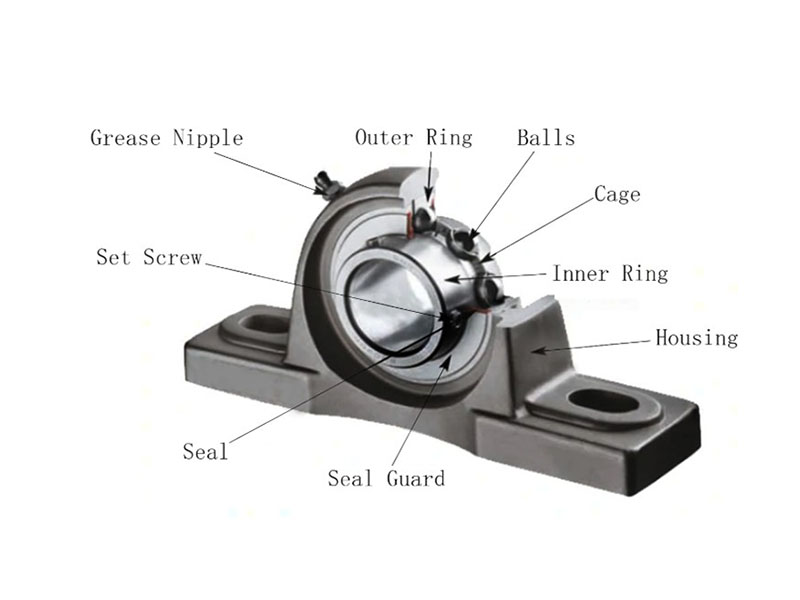
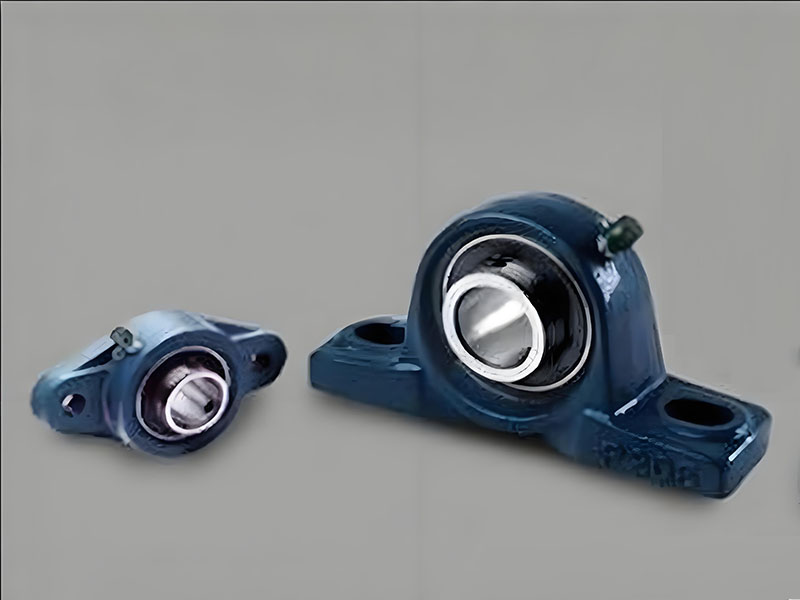
A pillow block bearing is a mounted bearing assembly designed to reduce rotational friction and provide stable support for a shaft. The bearing element sits inside a sturdy housing, typically made from cast iron, ductile iron, or steel. These units come pre-assembled and pre-lubricated from the factory – you can mount them immediately after unpacking. They are also referred to as housed bearing units in many industrial catalogs.
The housing mounts to a flat base using bolts, with the shaft running parallel to the mounting surface. Two common housing configurations exist:
- Solid housing: A single-piece casting
- Split housing: A two-piece design that allows the bearing to be accessed without removing the shaft
Inside the housing, the bearing itself may be a ball bearing, a roller bearing, or a tapered bearing. To secure the shaft to the bearing, manufacturers use various locking mechanisms: set screws, eccentric locking collars, standard locking collars, or tapered adapter sleeves.
Sealing is another important variable. Some seals provide clearance for low-friction operation; others make light or heavy contact with the shaft to block contaminants. Additionally, pillow block bearings fall into two functional categories: fixed (non-expansion) units, which locate the shaft axially, and expansion units, which allow the shaft to move axially as thermal expansion occurs – preventing thrust loads from building up against adjacent bearings.
Understanding self-alignment: Most pillow block bearings incorporate a spherical outer ring surface. This design allows the housing to tilt slightly relative to the bearing insert, compensating for minor shaft misalignment – typically up to 1 to 2 degrees. This is a valuable feature, but it is not a substitute for careful installation. The self-aligning capability handles small mounting imperfections; it cannot correct gross alignment errors.
Selecting the appropriate locking device and seal type for your operating environment is essential. When installed with care, a pillow block bearing can deliver years of reliable service.
Step-by-Step Pillow Block Bearing Installation
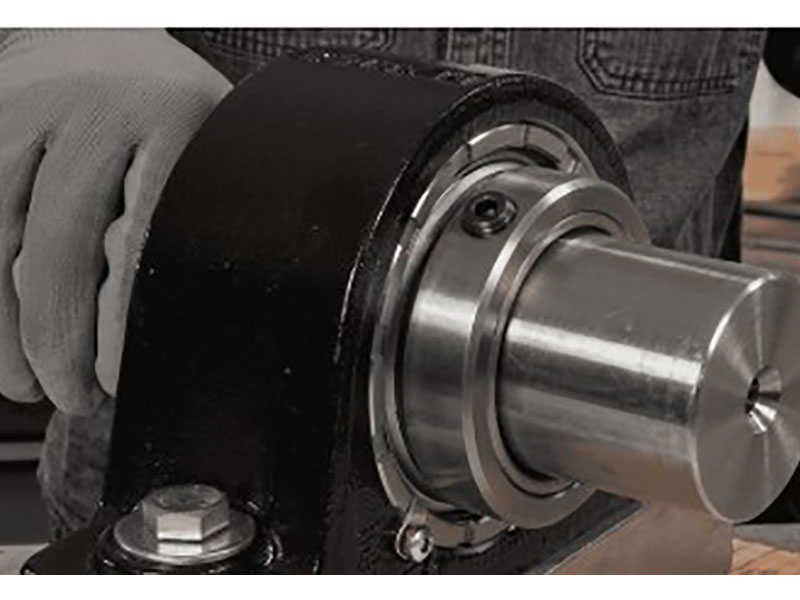
The following procedure covers the most common locking device type – set screws or set collars – and addresses both fixed and expansion bearing configurations.
Required Tools and Personal Safety Gear
Tool checklist:
- Soft-faced mallet
- Hardwood block (for transmitting impact to the inner ring)
- Hex key (Allen wrench) set
- Torque wrench
- Heavy flat washers or spring-lock washers
- Light machine oil
- Abrasive pads (fine-grit sandpaper or Scotch-Brite)
- Feeler gauge set (for split housings and surface flatness inspection)
- Precision straightedge
Personal protective equipment:
- Steel-toe safety footwear
- Impact-resistant safety glasses
- Clean gloves – dirty gloves can introduce contaminants to the bearing
Step 1: Inspect and Prepare the Shaft Surface
Begin by confirming that the shaft is clean, straight, and within the correct diameter tolerance for your bearing. Remove any rust, burrs, or surface contamination using fine sandpaper or an abrasive pad. Wipe the shaft clean with a lint-free cloth, then apply a thin film of light machine oil to ease bearing installation.
For best results, the shaft should be precision-ground. An undersized shaft allows the inner ring to creep or spin, which damages the shaft and bearing seat. An oversized shaft makes installation difficult and may preload the bearing, causing excessive heat generation. The generally accepted shaft tolerance range is h6 or g6, with a surface finish of approximately Ra 0.8 to 1.6 μm.
Practical tip from DUHUI field experience: In automotive driveline applications, we frequently encounter shafts that have worn below tolerance due to previous bearing creep. Always take diameter measurements at multiple points along the shaft before beginning installation. A shaft that is 0.001 inch undersized can already compromise the locking mechanism’s holding power.
Step 2: Slide the Bearing onto the Shaft
Position the bearing by sliding it along the shaft to its approximate mounting location. If the bearing fits tightly and requires light tapping, use a soft-faced mallet and a hardwood block placed against the inner ring face only. A soft steel tube can also work as a drift.
Critical safety and quality warning: Never apply impact force to the housing, the outer ring, or any seal component. Striking these parts can distort the housing bore, dent the rolling elements, or damage the seals – all of which lead to premature failure.
Step 3: Position the Housing with Light Bolting
Set the housing onto the mounting base and insert the mounting bolts. Place heavy washers or spring-lock washers across the bolt slots to help resist loosening during operation. At this stage, tighten the bolts only enough to hold the housing in place – the housing should still be able to move slightly within the bolt slot clearance. This freedom of movement is essential for the final alignment step.
Step 4: Establish Final Alignment
With both bearing housings lightly bolted, align the units by hand or with gentle taps from a rubber mallet. The goal is to achieve a straight, parallel shaft alignment across both bearings. This step directly determines bearing life.
The human eye cannot reliably detect misalignment of less than approximately 0.5 degrees. At this seemingly small angle, the bearing experiences cyclic radial loads that generate heat, accelerate raceway fatigue, and degrade seal performance – shortening service life dramatically.
For high-speed or high-load applications, use a laser alignment tool or a dial indicator to achieve precision alignment. Learning to use these instruments correctly pays off in reduced downtime and longer bearing life.
Step 5: Fully Tighten the Mounting Bolts
Once you are satisfied with the alignment, tighten all mounting bolts to the recommended torque specification. Use a crisscross tightening pattern to distribute clamping force evenly across the housing base. Select bolts with a strength rating of Class 8.8 or higher to prevent stretching under cyclic loads.
Important principle: Do not use bolt torque as a way to force a pillow block flat against an uneven surface. You are not correcting the surface – you are distorting the housing. Always fix the base surface first, then tighten the bolts.
Step 6: Verify Axial Shaft Movement
After the housings are fully bolted, manually push or pull the shaft to confirm it can move freely in the axial direction through both bearing bores. If the shaft binds or resists movement, the bearings are not properly aligned. Loosen the housings and repeat the alignment process.
This axial movement check is the most reliable field verification of proper bearing alignment. Do not skip it.
Step 7: Torque the Set Screws
With alignment confirmed, tighten the set screws on the collar. Rotate the shaft to access both screws, and alternate between them as you bring each to the manufacturer’s specified torque. If you do not have a torque wrench, tighten each screw until the Allen wrench begins to show a permanent twist – this indicates the screw has reached its yield point.
Set screw torque reference: For a typical 1-inch shaft diameter, the set screw torque range is generally 15 to 20 ft-lbs. However, always consult the specific torque chart provided by your bearing supplier for your exact bearing size and screw thread.
Critical caution: Never overtighten set screws. Excessive torque can crush the inner ring, creating stress concentrations that lead to premature fracture or misalignment. Tight is correct. Too tight is damaging.
For set screw style locks, the standard sequence is: tighten the first screw to full torque, rotate the shaft 90 degrees, then tighten the second screw to full torque.
Step 8: Mount the Expansion Bearing (When Used)
If your application includes an expansion bearing, always lock the fixed (non-expansion) bearing first. Next, slide the expansion bearing along the shaft until it is centered within its housing – this central position allows the bearing to accommodate thermal growth in both directions. Once centered, tighten the set screws using the same two-step sequence and torque values as the fixed bearing.
Common Installation Mistakes and How to Avoid Them
DUHUI Bearing’s failure analysis lab examines returned bearings from automotive and industrial customers daily. The data is consistent: improper installation accounts for over 60% of premature field failures. Below are the six most frequent errors we observe.
Mistake 1: Installing on an Uneven Base Surface
This error is the single most destructive mistake in pillow block mounting. When you tighten bolts on an uneven base, you twist the housing. The bore deforms from round to oval. The bearing inside now operates under uneven radial loading that the design never anticipated.
Quantified impact of surface deviation:
- 0.002 inches (0.05 mm) deviation: measurable housing distortion begins
- 0.005 inches (0.13 mm): bearing life reduced by approximately 30%
- 0.010 inches (0.25 mm): bearing life reduced by 50% or more
- 0.015 inches (0.38 mm) and above: bearing operates entirely outside design parameters
Prevention: Before installation, check base flatness using a precision straightedge and feeler gauge. If the surface exceeds 0.002 inches per foot, have it machined or ground flat. For minor irregularities, use precision shims to achieve a level mounting surface.
DUHUI field case: An automotive assembly line customer replaced the same pillow block bearing three times within six months. Each new bearing failed within weeks. Our field engineer measured the mounting base and found a 0.012-inch bow. After grinding the base flat, the same bearing model ran continuously for more than 18 months without any failure.
Mistake 2: Relying on Visual Alignment
The human eye cannot detect misalignment of less than about 0.5 degrees. At that threshold, the bearing already experiences significant additional radial loading. Visual alignment is not adequate for any application requiring reasonable bearing life.
Prevention: Use the axial movement test described in Step 6. For precision applications, invest in laser alignment tools or dial indicators.
Mistake 3: Installing on an Undersized or Damaged Shaft
A shaft that is too small or worn prevents the locking device from securing the bearing properly. The inner ring can creep or spin, generating wear debris and damaging both the shaft and the bearing bore.
Prevention: Measure shaft diameter at multiple locations. The bearing should slide onto the shaft with a smooth, snug fit. Never force installation. Never install on a shaft that shows signs of wear, scoring, or corrosion.
Mistake 4: Overtightening the Locking Mechanism
Heavy-handed tightening of set screws or locking collars is a common problem. Excessive force crushes the inner ring, creates localized stress risers, and leads to ring fracture under normal operating loads.
Prevention: Use a calibrated torque wrench and follow the manufacturer’s torque specifications. If you cannot obtain the spec, use the Allen-wrench-twist method as a backup – but a torque wrench is always preferred.
Mistake 5: Using Uneven or Inadequate Bolt Torque on Mounting Bolts
Mounting bolts that are loose, over-tightened, or unevenly tightened allow the housing to shift under load. Vibration develops, alignment drifts, and the bearing fails prematurely.
Prevention: Tighten bolts progressively in a crisscross sequence. Use a torque wrench to achieve uniform clamp load across all bolts.
Mistake 6: Neglecting Lubrication or Using the Wrong Grease
Bearings need proper lubrication to manage friction and dissipate heat. Without it, they run hot and wear rapidly. The wrong grease – or mixing incompatible greases – can thicken, separate, or lose its lubricating properties.
Prevention: Use the grease grade specified by the bearing manufacturer. Do not mix different grease types unless compatibility is confirmed. For sealed, pre-greased bearings, do not over-grease – excess grease creates pressure and heat.
Important note on maintenance-free bearings: Some pillow block bearings are designated “maintenance-free.” These units come sealed with a lifetime grease charge and special seals. Do not attempt to add grease to these units – it can damage the seals and create contamination pathways.
Maintenance Recommendations for Pillow Block Bearings
- Relubrication schedule: For standard relubricatable units, re-grease every 3 to 6 months under normal operating conditions. Adjust this interval based on temperature, speed, and contamination exposure. Always use the manufacturer-recommended grease type.
- Alignment verification: Check alignment quarterly. Even minor shifts in the mounting structure over time can affect bearing performance.
- Condition monitoring: Watch for unusual noise, excessive vibration, or temperature spikes during operation. These are early indicators of developing problems.
- Cleanliness discipline: Before each lubrication event, clean the area around the grease fitting. Contaminants pushed into the bearing are a leading cause of early failure.
- Contamination control: Protect bearings from water, chemical splashes, and airborne dust. If the operating environment is severe, consider bearings with heavy-contact seals.
Conclusion
Installing a pillow block bearing correctly requires careful attention to five key areas:
- Base flatness: Verify it. At 0.010 inches deviation, you lose more than half your bearing life.
- Alignment: Do not guess. Use the axial movement test as your final confirmation.
- Torque control: Use a torque wrench for set screws and mounting bolts. Overtightening is as damaging as undertightening.
- Cleanliness: Keep the shaft, bearing bore, and work area free from contaminants.
- Lubrication strategy: Know whether your bearing is maintenance-free or relubricatable. Use the correct grease on the correct schedule.
The installation itself takes maybe 30 minutes. Taking shortcuts to save 5 minutes can cost you months of service life. A correctly installed bearing will run trouble-free for years. An incorrectly installed bearing fails quickly – and the problem is almost never the bearing’s quality.
At DUHUI Bearing, we have spent two decades manufacturing bearings to IATF 16949 standards. We know from analyzing thousands of field returns that installation errors are the leading cause of early failure. Follow the steps in this guide, and you will achieve the full service life your bearing was engineered to deliver.
For technical support, application guidance, or more information about DUHUI Bearing’s product range, please contact our engineering team.
Frequently Asked Questions
Q1: Is it necessary to lubricate a pillow block bearing before installation?
Most pillow block bearings leave the factory pre-greased and sealed, ready for immediate use. However, you should always apply a thin coat of light oil to the shaft before sliding the bearing on – this eases installation and prevents galling. For maintenance-free bearings, do not add additional grease.
Q2: Is it acceptable to tap a pillow block bearing with a hammer?
No. If tapping is required, use a soft-faced mallet and a hardwood block applied to the inner ring face only. Never strike the housing, outer ring, or seals.
Q3: What happens if the mounting surface is not flat?
An uneven surface distorts the housing when bolts are tightened. The housing bore becomes oval, subjecting the bearing to uneven loading. A deviation of 0.010 inches (0.25 mm) can reduce bearing life by more than 50%.
Q4: How do I determine the correct set screw torque?
Always refer to your bearing manufacturer’s torque specification chart. As a typical reference, a 1-inch shaft uses approximately 15 to 20 ft-lbs. If you lack a torque wrench, tighten until the Allen wrench shows a permanent twist – but a torque wrench is strongly recommended.
Q5: How can I confirm that the bearings are properly aligned?
After bolting the housings, push or pull the shaft axially. If it moves freely through both bearings, alignment is correct. If it binds, loosen and realign.
Q6: What is the installation sequence for fixed and expansion bearings?
Secure the fixed (non-expansion) bearing first. Then position the expansion bearing at the center of its housing and tighten its set screws using the same procedure.
Q7: What maintenance schedule should I follow?
For relubricatable units, re-grease every 3 to 6 months. Check alignment quarterly. Monitor noise, vibration, and temperature continuously. For maintenance-free units, follow the manufacturer’s replacement schedule and never add grease.
Q8: What causes most pillow block bearing failures?
Based on DUHUI Bearing’s field return analysis, the top causes are: improper installation leading to misalignment, inadequate lubrication, and contamination. Surface flatness problems and overtightened set screws rank among the most frequent specific errors. These installation-related issues far outnumber bearing quality defects as a cause of field failure.