Quick Answer
The tensioner pulley is mounted on the spring‑loaded tensioner arm. To locate it, find the serpentine belt and look for the pulley attached to the movable arm, which typically has a square or hex hole for inserting a wrench. On most cars, it is near the alternator. On vehicles like the 2007 Honda Odyssey, it is located on the passenger side of the engine and is best accessed after removing the front passenger wheel.
When inspecting a serpentine belt or diagnosing belt noise, one of the first questions that comes up is: where is the tensioner pulley located? The answer varies by vehicle, but understanding its typical position and basic function can help both professional technicians and DIYers perform accurate inspections and maintenance. This article explains what the tensioner pulley is, where to find it, how it differs from an idler pulley, and how to access it safely.
What Is a Tensioner Pulley?
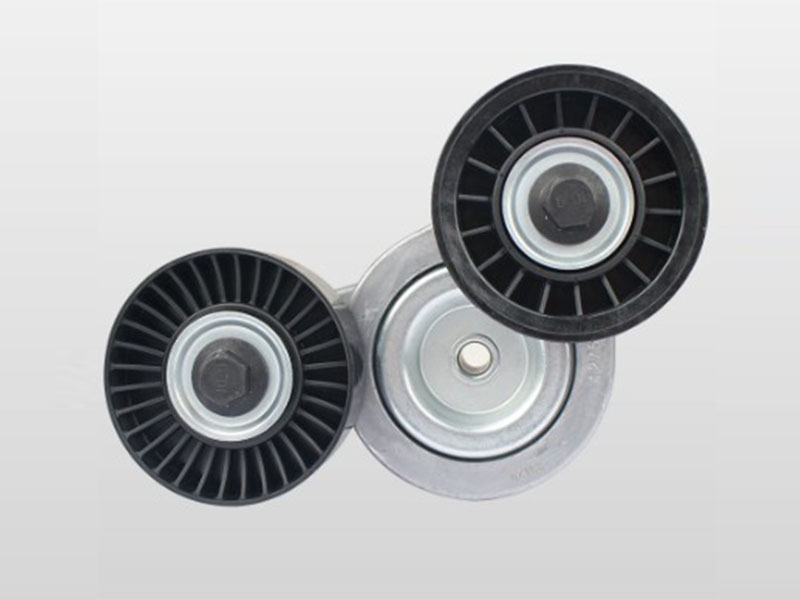
A tensioner pulley is a rotating wheel mounted on a spring‑loaded or hydraulic tensioner assembly. Its main purpose is to apply and maintain proper tension on the serpentine belt (also known as the accessory drive belt). Unlike fixed pulleys, the tensioner pulley moves slightly to accommodate belt stretch and changes in load from engine accessories such as the alternator, air conditioning compressor, or power steering pump.
The tensioner pulley includes a bearing that is permanently sealed and pre‑lubricated. In most vehicles, it is part of a complete tensioner assembly, although some designs allow the pulley to be replaced separately.
Functions of the Tensioner Pulley
The tensioner pulley performs several specific tasks within the belt drive system:
- Maintains belt tension – It keeps the serpentine belt tight enough to prevent slippage while avoiding excessive tension that could damage bearings.
- Ensures belt alignment – It helps the belt stay centered on the crankshaft pulley and other accessory pulleys as it rotates.
- Absorbs shock loads – When an accessory like the AC compressor engages, the tensioner pulley dampens sudden load changes, reducing vibration and belt flutter.
A properly functioning tensioner pulley extends the service life of both the serpentine belt and the accessories it drives.
Where Is the Tensioner Pulley Typically Located?
The tensioner pulley is always located along the path of the serpentine belt, but its exact position depends on the engine layout. This section answers the question where is the tensioner pulley located across different engine designs.
In most front‑wheel‑drive vehicles with transverse engines, the tensioner assembly is positioned on the front or side of the engine, often near the alternator or the water pump.
To locate the tensioner pulley:
- Open the hood and locate the serpentine belt.
- Follow the belt path from the crankshaft pulley upward.
- Look for a pulley that is not directly bolted to an accessory but instead mounted on a movable arm with a spring or hydraulic mechanism.
- The arm typically has a square, hexagonal, or bolt‑head feature used to release belt tension.
Examples from specific models:
- On many Toyota models (e.g., 2008 Camry), the tensioner pulley is next to the alternator, clearly visible from above.
- On some Honda models (e.g., 2007 Odyssey), the belt system is not accessible from the top. Instead, the tensioner pulley is located behind the passenger‑side front wheel and requires removing the tire for access.
In vehicles with limited engine bay space, the tensioner pulley may be mounted low on the engine, near the crankshaft or the power steering pump. In such cases, accessing it may require raising the vehicle and removing the splash shield.
Tensioner Pulley vs. Idler Pulley
Although the tensioner pulley and idler pulley look similar, they serve different roles in the belt drive system.
| Feature | Tensioner Pulley | Idler Pulley |
|---|---|---|
| Mounting | Spring‑loaded or hydraulic arm | Fixed bracket |
| Movement | Moves with belt tension changes | Stationary |
| Function | Applies variable tension to the belt | Guides the belt, changes direction |
| Failure symptoms | Belt slippage, chirping noise, misalignment | Squealing, bearing noise, belt wear |
- Tensioner pulley – Adjusts its position to maintain correct belt tightness. If the spring weakens, the belt may slip or jump.
- Idler pulley – Does not apply tension. It only provides a fixed surface for the belt to run against. A worn idler pulley typically produces a constant grinding or squealing noise.
Understanding this difference helps when ordering replacement parts. An idler pulley alone cannot solve tension problems, and a worn tensioner assembly cannot be repaired by replacing only the idler pulley.
How to Access the Tensioner Pulley
Accessing the tensioner pulley usually requires releasing belt tension and removing the serpentine belt. Below are general steps, followed by notes on more complex cases.
General access procedure:
- Disconnect the negative battery terminal.
- Identify the tensioner arm and the tool interface (e.g., a ½‑inch square drive, 15mm hex, or a bolt head).
- Insert a breaker bar, ratchet (without socket), or a specialized serpentine belt tool into the interface.
- Rotate the tensioner against its spring pressure to slacken the belt.
- Slip the belt off one of the pulleys, typically the alternator or a smooth idler.
- With the belt removed, unbolt the tensioner pulley from the arm, or remove the entire tensioner assembly if required.
Cases requiring extra steps:
On certain vehicles, such as the 2007 Honda Odyssey, the tensioner pulley is not visible from the top. The procedure includes:
- Jacking up the front passenger side and securing the vehicle on jack stands.
- Removing the passenger‑side front wheel.
- Removing the inner fender liner or splash shield.
- Accessing the belt and tensioner from the side of the engine.
Important notes:
- Some tensioner pulleys use a left‑hand thread bolt. If the bolt has a left‑hand thread, it will loosen when turned clockwise (opposite of a standard bolt). Always verify thread direction before applying force.
- If a new tensioner assembly includes a locking pin, keep the pin in place during belt routing. Only remove the locking pin after the belt is correctly positioned on all pulleys.
- After reinstalling the belt and releasing the tensioner, rotate the crankshaft pulley manually two full turns to ensure the belt is seated properly. Then start the engine and listen for abnormal noise.
Conclusion
Knowing where the tensioner pulley is located is the first step in maintaining the serpentine belt system. The tensioner pulley maintains proper belt tension, ensures alignment, and absorbs shock loads. Its location varies by vehicle but is always along the belt path, typically on a spring‑loaded arm near the alternator or lower on the engine. Differentiating the tensioner pulley from an idler pulley is essential for accurate diagnosis and repair. Accessing the tensioner pulley generally requires releasing belt tension with a suitable tool, and some vehicles demand additional disassembly such as removing the undercover. Regular inspection and timely replacement of the tensioner pulley help prevent belt failure and costly engine damage.
FAQs
Q1: How can I quickly find the tensioner pulley on my car?
Follow the serpentine belt and look for a pulley mounted on an arm that can move. The arm usually has a square or hexagonal hole for inserting a wrench. That arm is the tensioner, and the pulley at its end is the tensioner pulley.
Q2: Is it safe to drive with a bad tensioner pulley?
No. A failing tensioner pulley can cause belt slippage, overheating, loss of charging, and sudden belt breakage. If the belt breaks while driving, the engine may overheat and power steering will fail. It is recommended to replace a faulty tensioner pulley before driving further.
Q3: How often should the tensioner pulley be replaced?
Most automotive experts recommend inspecting the serpentine belt and tensioner pulley every 30,000 miles (approximately 48,000 km). For replacement, many manufacturers suggest changing the belt around 90,000 miles (approximately 145,000 km), and the tensioner pulley should be replaced at the same time. As a best practice, replace the tensioner pulley whenever the serpentine belt is replaced, as a worn tensioner can accelerate belt wear.
Q4: Does the tensioner pulley bearing require lubrication?
No. The bearing is sealed and pre‑lubricated for life. It requires no routine grease or oil. If noise or roughness develops, replace the entire pulley rather than attempting to lubricate it.
Q5: What is the difference between a tensioner assembly and a tensioner pulley?
The tensioner assembly includes the spring‑loaded arm, pivot mechanism, mounting bracket, and the tensioner pulley. The tensioner pulley is only the wheel and its bearing. On some vehicles, the pulley can be replaced separately, but replacing the whole assembly ensures that the spring and pivot are also in good condition.
Q6: What should I check when replacing a tensioner pulley?
Always record or photograph the belt routing before removal. Check whether the pulley bolt has a left‑hand thread. If replacing the whole tensioner, keep the locking pin in place until the belt is installed. After assembly, visually inspect belt alignment and run the engine briefly to check for noise.


