Quick Answer
How do you replace a front wheel bearing? Lift the vehicle, remove the wheel and brake caliper, then take off the rotor. For a bolt-on hub, unbolt and replace the whole assembly. For a press-in bearing, remove the steering knuckle and press the old bearing out, then press in the new one—only push on the outer race. Reinstall all parts and torque the axle nut and lug nuts to factory specs. Test drive for noise. If you lack a press, have a shop press the bearing while you do the rest.
A humming or grinding noise from your front wheel, especially when turning, often points to a worn front wheel bearing. Many vehicle owners choose to replace a front wheel bearing at home to save on repair costs. This guide explains how to replace front wheel bearing assemblies correctly, whether your vehicle uses a bolt-on hub unit or a press-in bearing.
What Is a Front Wheel Bearing and How Does It Work?
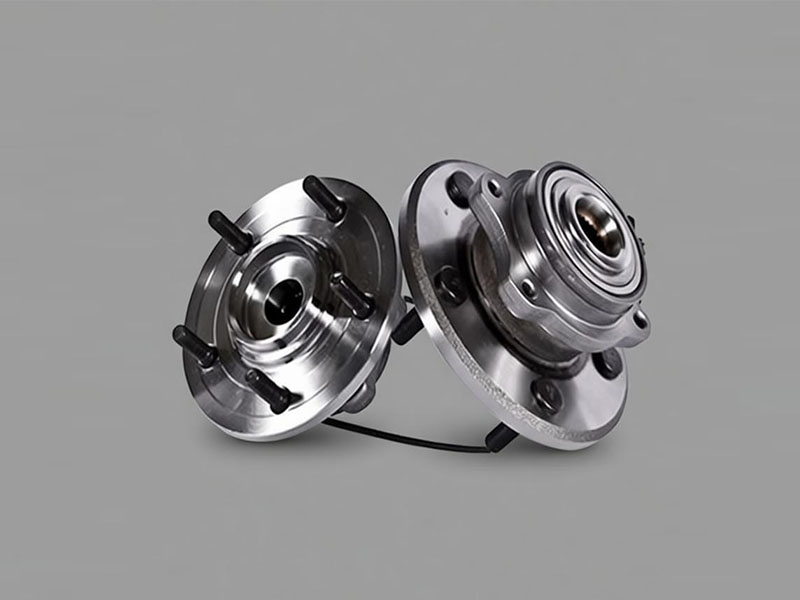
A front wheel bearing is a set of steel balls or rollers enclosed in a metal race. It sits inside the wheel hub, allowing the wheel to rotate with minimal friction while supporting the vehicle’s weight. Most modern vehicles use sealed bearing units that cannot be repacked with grease – they must be replaced as a complete assembly when they fail. Understanding the bearing type on your vehicle (bolt-on hub assembly vs. press-in bearing) is the first step before you learn how to replace front wheel bearing components safely.
Signs That Your Front Wheel Bearing Needs Replacement
Recognising a failing bearing early prevents further damage. Common symptoms include:
- A constant humming, growling, or grinding noise that increases with vehicle speed
- Steering wheel vibration that gets worse as you accelerate
- Wheel wobble or excessive play when the wheel is lifted
- The ABS warning light illuminates due to sensor interference
- Clicking or snapping sounds when making sharp turns
If you notice any of these signs, plan to replace the front wheel bearing promptly. Driving with a worn bearing can lead to brake problems, uneven tyre wear, or even wheel separation.
Tools and Materials Required
Replacing a front wheel bearing is a moderate-difficulty DIY job. Gather the following before starting:
Essential tools
- Jack and two jack stands
- Lug wrench
- Ratchet and socket set (metric or imperial, depending on your vehicle)
- Torque wrench (critical for fasteners)
- Breaker bar (for stubborn axle nuts)
- Pry bar or large flat screwdriver
- Hammer and punch
- Needle-nose pliers
- Safety glasses and mechanic gloves
Helpful but not mandatory
- Impact wrench
- Slide hammer or hub puller
- Bearing press (for press-in bearings)
- Wheel chocks
Materials
- New front wheel bearing or hub assembly (confirm fitment for your vehicle’s make, model, and year)
- New axle nut (always replace; the old one may lose its locking ability)
- Penetrating oil (e.g., WD-40)
- Brake cleaner and clean rags
- Anti-seize compound (optional, for bolt threads)
If your vehicle uses a press-in bearing and you do not own a hydraulic press, you can remove the steering knuckle and take it to a local repair shop or auto parts store to have the old bearing pressed out and the new one pressed in. This approach lets you complete the removal and reassembly at home without expensive tools.
Preparing Your Vehicle for the Replacement
Proper preparation ensures safety and makes the job easier.
- Park on a level surface, engage the parking brake, and place wheel chocks behind the rear wheels.
- Slightly loosen the front lug nuts while the vehicle is still on the ground.
- Jack up the front of the vehicle and support it securely on jack stands. Never rely on a jack alone.
- Remove the lug nuts and take off the front wheel. Store the lug nuts in a safe place.
With the wheel removed, you will see the brake caliper, rotor, and wheel hub. The bearing is housed inside the hub.
Removing the Old Front Wheel Bearing
Removing Brake Components
- Unbolt the brake caliper using a suitable socket. Typically two bolts hold the caliper to the bracket.
- Slide the caliper off the rotor and hang it from the coil spring or strut using a piece of wire or a bungee cord. Do not let the caliper hang by the brake hose.
- Remove the brake rotor. If it is rusted in place, spray penetrating oil around the centre hub and tap the rotor’s hat area with a hammer.
Removing the Hub / Bearing Assembly
For bolt-on hub assemblies:
- Disconnect the ABS sensor wiring harness if present. Avoid pulling on the wire – release the clip carefully.
- From behind the steering knuckle, remove the bolts that secure the hub assembly.
- Tap the hub assembly with a hammer to loosen it, or use a slide hammer if it is corroded. The entire hub will come off as one unit.
For press-in bearings:
- Remove the axle nut using a breaker bar or impact wrench. You may need to have an assistant press the brake pedal to stop the hub from turning.
- Push the CV axle inward slightly to free it from the hub splines.
- Depending on access, you may need to remove the steering knuckle completely. Mark the position of any suspension bolts (e.g., ball joint, tie rod end) with a marker to help reassembly alignment.
- Using a bearing press, push the old bearing out of the knuckle. If you do not have a press, take the knuckle and new bearing to a shop for this step.
Installing the New Front Wheel Bearing
Before installing the new bearing, clean the hub mounting surface or the knuckle bore thoroughly. Use a wire brush and brake cleaner to remove rust, dirt, and old grease. Inspect for cracks or damage that could affect the new bearing.
For bolt-on hubs:
- Position the new hub assembly onto the steering knuckle. Hand-start the mounting bolts.
- Tighten the bolts evenly in a crossing pattern to the torque specified in your vehicle’s service manual (typically 50–80 lb-ft, but always verify).
- Reconnect the ABS sensor harness.
For press-in bearings:
- Apply a thin layer of anti-seize or clean grease to the knuckle bore (if not prohibited by the bearing manufacturer).
- Place the new bearing into the bore. Use a press and appropriate adapters to push the bearing in. Pressure must be applied only to the outer race – never to the inner race or the balls, as that will damage the bearing.
- Install any snap ring that retains the bearing.
- Reinstall the steering knuckle if it was removed, aligning the marks you made earlier. Tighten all suspension bolts to factory torque.
- Reinsert the CV axle through the hub splines and install a new axle nut.
Reassembling and Testing
- Reinstall the brake rotor and the caliper. Tighten the caliper bolts to the specified torque.
- If your vehicle uses an axle nut, torque it according to the manufacturer’s specification. Many vehicles require 150–250 lb-ft. After torquing, stake the nut into the axle groove if required.
- Put the wheel back on and hand-tighten the lug nuts.
- Lower the vehicle so that the tyre just touches the ground but the suspension is still partly supported by the jack stands. Torque the lug nuts in a star pattern to the vehicle’s specification (typically 80–100 lb-ft for passenger cars). Then lower the vehicle completely.
- Take a short test drive at low speed. Listen for any humming, grinding, or unusual noise. Check that the steering feels smooth and there is no vibration. If everything is quiet, drive on a highway for a few miles and re-check.
- After the test drive, feel the wheel hub area – it should be warm but not hot. Excessive heat indicates improper bearing installation or a faulty new bearing.
Maintenance Tips to Extend Bearing Life
While sealed bearings do not require regular repacking, you can prolong their lifespan by:
- Avoiding deep potholes and driving over curbs at low speed.
- Not overloading your vehicle beyond its rated capacity.
- Rotating tyres every 8,000–10,000 km (5,000–6,000 miles) to ensure even load distribution.
- Replacing worn suspension components (ball joints, control arm bushings) that can put extra stress on bearings.
- Inspecting wheel bearings whenever you replace brake pads or tyres.
Conclusion
Knowing how to replace front wheel bearing assemblies empowers you to maintain your vehicle’s safety and performance. Whether you have a bolt-on hub or a press-in design, the key steps remain: secure the vehicle, remove the brake components, extract the old bearing, carefully install the new one, and torque every fastener to specification. Using a quality bearing from a reputable manufacturer ensures long service life. If you lack the tools or experience for a press-in bearing, consider having a professional perform the pressing step while you handle the rest. Always prioritise safety – when in doubt, consult a certified mechanic.
Frequently Asked Questions (FAQs)
Q: How long does it take to replace a front wheel bearing?
A: For a DIYer with basic tools, a bolt-on hub typically takes 1–2 hours per side. A press-in bearing may take 3–5 hours, especially if the steering knuckle must be removed and taken to a shop for pressing.
Q: Can I replace a front wheel bearing without a press?
A: Yes, if your vehicle uses a bolt-on hub assembly. For press-in bearings, you can remove the knuckle and have a shop do the pressing for a small fee. Using a hammer to drive a press-in bearing is not recommended – it often damages the bearing and leads to premature failure.
Q: Is it safe to drive with a worn wheel bearing?
A: No. A worn bearing can fail suddenly, causing the wheel to wobble, the brakes to malfunction, or even the wheel to detach. Replace it as soon as you notice symptoms.
Q: How much does it cost to replace a front wheel bearing?
A: DIY parts cost ranges from $40 to $200 for a single bearing or hub assembly. Professional repair typically runs $250–$500 per wheel, but prices vary by vehicle model and region.
Q: Do I need a wheel alignment after replacing a front wheel bearing?
A: Not always. If you only removed the hub/bearing without disconnecting suspension ball joints or tie rod ends, the alignment should remain unchanged. However, if you removed the steering knuckle or any control arm bolts, an alignment is strongly recommended.
Q: What happens if I over-torque or under-torque the axle nut?
A: Over-torquing pre-loads the bearing excessively, causing rapid wear and noise. Under-torquing allows play in the hub, which leads to vibration, poor handling, and eventual bearing failure. Always use a torque wrench and follow the manufacturer’s specification.
Q: Should I replace both front wheel bearings at the same time?
A: It is not mandatory, but if your vehicle has high mileage (over 120,000 km or 75,000 miles) and one bearing has failed, the other side is likely near the end of its life. Replacing both saves time and labour in the long run.


