If you own a trailer, knowing how to replace trailer wheel bearings is essential for safety and avoiding roadside breakdowns. Worn-out bearings are a leading cause of trailer axle failure, leading to costly repairs or even accidents. While the task requires mechanical aptitude, it is achievable with the right tools and attention to detail. In this guide, DUHUI will walk you through the process—from preparation to preload adjustment—so you can ensure your trailer rolls smoothly for thousands of miles.
Preparation and Safety First
Before lifting a single tool, prioritize safety. Trailers are heavy and unstable if not properly secured.
- Vehicle Securing: Park the trailer on a flat, solid surface. Use heavy-duty wheel chocks on the wheels that will remain on the ground to prevent rolling. When lifting, use a floor jack rated for the trailer’s weight, and always support the axle or frame with jack stands. Never rely solely on a jack.
- Personal Protective Equipment (PPE): Bearing grease contains metallic additives, and old components may have sharp edges. Wear safety glasses to protect against debris and nitrile gloves to keep grease off your skin and prevent contamination of the new grease.
Tools and Consumables You’ll Need
Gathering everything beforehand streamlines the process. Using high-quality consumables is critical for longevity.
Essential Tools:
- Floor jack and jack stands
- Lug wrench (often 3/4″ or 13/16″ for trailers)
- Socket set and breaker bar (for the spindle nut)
- Needle-nose pliers (to remove the cotter pin or lock washer)
- Bearing driver or a brass punch (to remove bearing races)
- Hammer and flathead screwdriver (for removing the old seal)
- Clean rags and solvent/degreaser
Consumables:
- High-quality bearing grease: Use a marine-grade or high-temperature lithium complex grease designed for trailer wheel bearings.
- New grease seal: Always replace the seal once removed; reusing it will almost certainly cause leakage.
- Cotter pin: Never reuse the old cotter pin.
Understanding Your Trailer’s Bearing Configuration
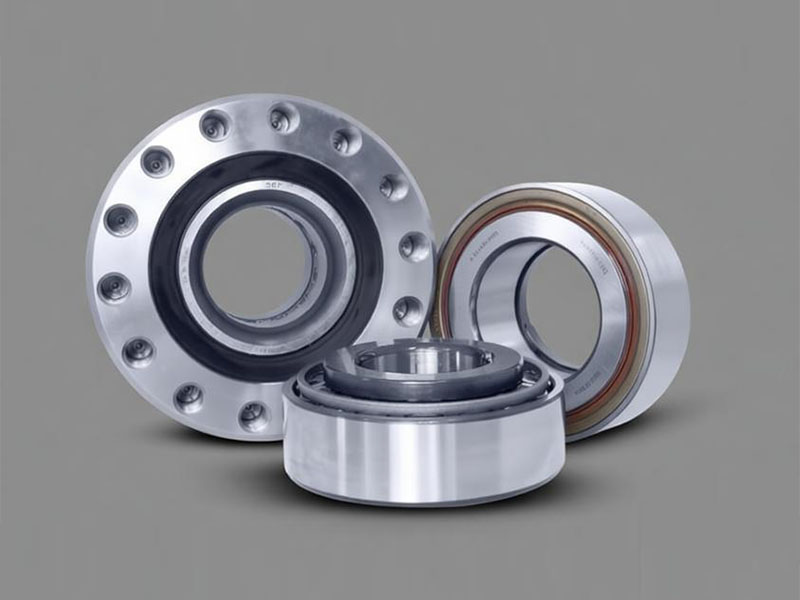
Most trailers use tapered roller bearings—specifically, an inner bearing and an outer bearing. The inner bearing sits inside the hub behind the grease seal, while the outer bearing is accessible once the hub is removed. Understanding this configuration helps you avoid forcing components during reassembly. As a manufacturer of precision automotive wheel hub bearings, we emphasize that the quality of these components directly impacts the safety of your towing experience.
Step-by-Step Disassembly and Inspection
Removing the Hub Assembly:
- Loosen the lug nuts slightly before lifting the trailer.
- Jack up the trailer and secure it on jack stands. Remove the lug nuts and take off the wheel.
- Pry off the dust cap (grease cap) using a flathead screwdriver.
- Remove the cotter pin and the spindle nut retainer (if applicable).
- Unscrew the spindle nut. As you remove it, be ready to catch the outer bearing, which may slide out with the washer.
Extracting and Inspecting:
- Pull the hub straight off the spindle. The outer bearing will come off with the hub.
- Use a seal puller or screwdriver to carefully remove the old grease seal from the back of the hub. Once removed, you can access the inner bearing.
- Critical Inspection: Clean the bearings and the hub races (the surfaces where the bearings ride) with solvent. Examine the rollers and races for pitting, galling, bluish discoloration (indicating overheating), or flat spots. If any damage is visible, the bearings and races must be replaced as a set.
Cleaning and Lubrication
Degreasing: Clean the inside of the hub, the spindle, and the bearings with solvent. Dry them thoroughly with lint-free rags.
Hand-Packing Bearings: This is the most reliable method. Place a dollop of grease in the palm of your hand. Hold the bearing with the larger side down and press the edge of the bearing into the grease until it extrudes from the top. Repeat until grease oozes from every roller. Do not rely on a grease gun alone; hand-packing ensures complete lubrication.
Replacing the Grease Seal: Lightly coat the new grease seal lip with grease. Use a seal driver or a flat block of wood to tap the new seal squarely into the hub until it is flush with the hub surface.
Reassembly and Critical Bearing Preload Adjustment
Installation:
- Slide the hub back onto the spindle, being careful not to damage the new seal.
- Insert the outer bearing into the hub, followed by the thrust washer.
The Preload Adjustment Process:
Proper bearing preload prevents both looseness (which causes vibration) and over-tightening (which causes overheating).
- Tighten the spindle nut to 20-25 ft-lbs while rotating the hub to seat the bearings.
- Back off the nut until it is just loose (approximately 1/4 to 1/2 turn).
- Finger-tighten the nut until snug. Then, tighten the nut to the next available slot for the cotter pin.
- Final Check: The hub should spin freely with no roughness. Grab the hub at the top and bottom; there should be no detectable axial (side-to-side) play.
Maintenance Tips to Extend Bearing Life
- Inspection Intervals: Repack bearings and inspect seals every 12 months or 10,000 miles, whichever comes first. For boat trailers, inspect more frequently due to water exposure.
- Watch for Leaks: If you see grease on the inside of the tire or rim, the seal has failed.
- Water Protection: For boat trailers, allow bearings to cool before backing into water. Hot hubs suck in cold water, contaminating the grease.
- Storage: If the trailer is idle for long periods, jack it up to relieve weight from the bearings.
When to Seek Professional Help
While replacing bearings is a manageable DIY task, certain conditions require professional expertise:
- Severe Spindle Damage: If the spindle has grooves, scoring, or a blue tint (from heat), it requires machining or replacement.
- Cracked or Pitted Races: If the hub’s inner races are damaged, pressing in new races requires specialized tools.
- Lack of Torque Wrench: Precision adjustments are critical. If you don’t have a torque wrench for the initial seating, or if you are unsure about the preload feel, it’s safer to consult a mechanic.
Conclusion
Learning how to replace trailer wheel bearings is a valuable skill that enhances safety and extends the life of your trailer. By following these steps—prioritizing safety, using high-quality components like premium grease and seals, and mastering the preload adjustment—you can prevent bearing failure on the road. Regular maintenance not only saves money but also gives you peace of mind during every journey. If you are sourcing precision-engineered components for your trailers, ensure you choose reliable bearing solutions that meet stringent quality standards.


