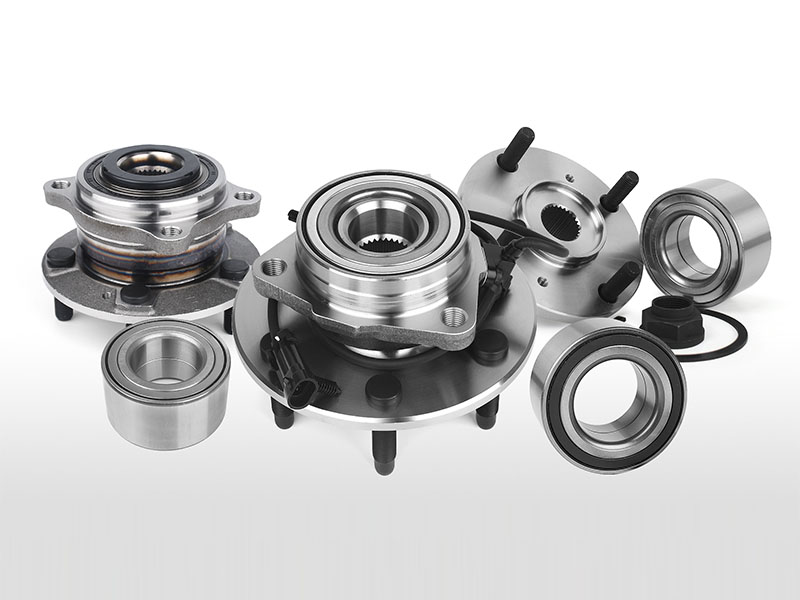
The automotive wheel bearings most commonly used in pairs of single-row tapered roller bearings or ball bearings in the past. With the advancement of technology, passenger cars have widely adopted integrated wheel hub bearings.
The application scope and usage volume of wheel hub bearing units are increasing day by day, and they have now developed to the third generation:
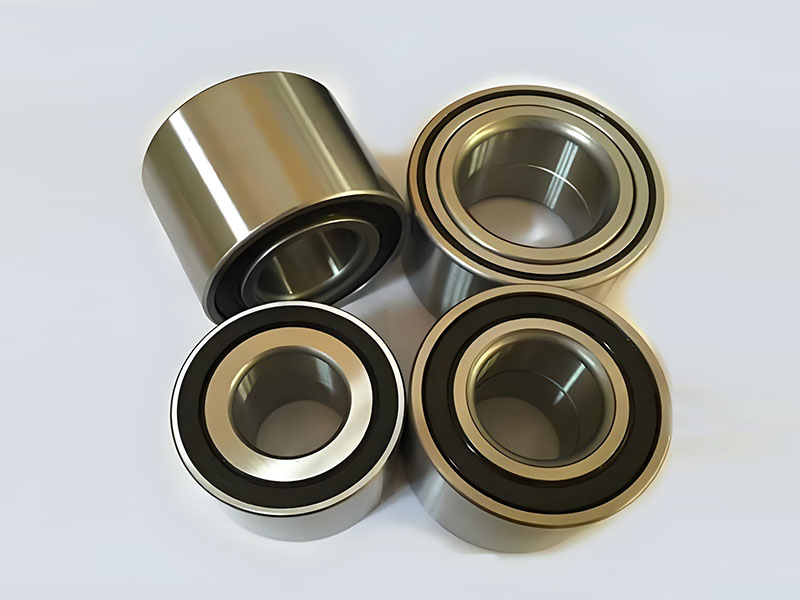
- Gen1 wheel bearing consists of double-row roller or ball bearings.
- Gen2 wheel hub bearing has a flange on the outer raceway for fixing it, allowing the bearing to be easily fitted onto the wheel axle and secured with a nut. This makes automobile maintenance easier.
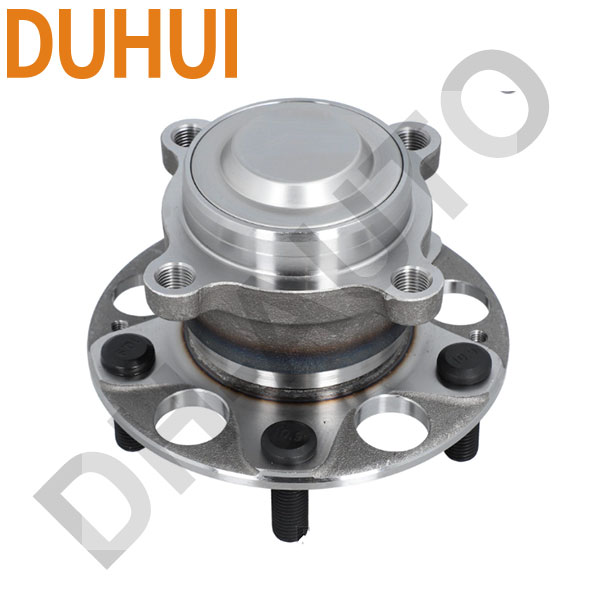
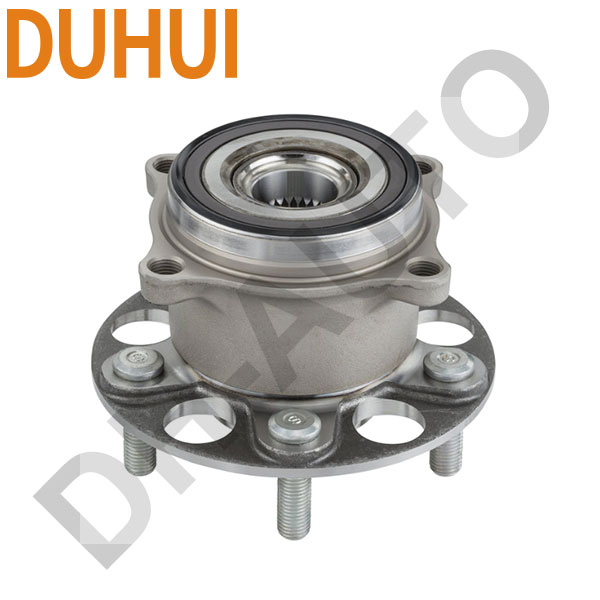
- The Gen3 wheel hub bearing integrates the bearing unit with the anti-lock braking system (ABS). The wheel hub unit is designed with an inner flange and an outer flange. The inner flange is bolted to the drive shaft, while the outer flange installs the entire bearing assembly together.

Choose DUHUI wheel bearings.
1. Installation Precautions for Wheel Bearing and Wheel Hub Assembly
Worn or damaged wheel hub bearings or hub units can cause your vehicle to experience inappropriate and costly failures during travel and may even compromise your safety. When the use and installation of wheel hub bearings is done, you need to keep the following things in mind:
1.1 Regular Inspection
The wheel hub bearings need to be checked on a regular basis, or any time the vehicle shows signs of bearing wear, which include the noise that occurs during rotation or the decrease of the speed of the suspension, and the wheel assembly when turning.
To attain the highest level of safety and reliability, it is fitted that you should periodically check the wheel hub bearings. Front wheel hub bearings should be lubricated at 38,000 km in rear wheel drive vehicles. Check the bearings when replacing the braking system and replace the oil seals.
1.2 Identify Noise Source First
If you hear noise coming from the wheel hub bearing area, the first and most important step is to locate the source of the noise.
There are many moving parts that could potentially produce noise, or it could be due to contact between rotating and non-rotating parts.
If the noise is confirmed to be from the bearing, the bearing may be damaged and requireS replacement.
1.3 Replace in Pairs
Because the working conditions leading to failure of the bearings on both sides are similar for front wheel hubs, it is recommended to replace them in pairs even if only one bearing is faulty.
1.4 Use Proper Method & Tools
Wheel hub bearings are sensitive. Install them using the correct methods and right tools. Keep the bearing parts safe at the time of storage, transportation and installation. It requires special tools and great pressure in some bearings. Always refer to the manufacturer’s guidelines of the installer of the automobile.
1.5 Ensure Clean Environment
It is necessary to install bearings in a clean and orderly environment. Even small particles that enter the bearing can reduce its duration of service. It is highly necessary to maintain a clean environment when changing bearings.
Do not strike bearings with a hammer, and ensure bearings do not fall on the ground or suffer similar mishandling ) .
Before installation, also check the condition of the shaft and bearing housing. Even minor wear can lead to poor fitment, causing premature bearing failure.
1.6 No Disassembly or Seal Adjustment
Please do not attempt to disassemble the wheel hub bearing or adjust the sealing ring of the hub unit, as this may damage the seal, allowing water or dust to enter. Even the sealing ring and the raceway of the inner ring may be damaged, resulting in permanent failure of the bearing.
1.7 Handle ABS Parts with Care
 The sealing ring of ABS WHBs has a magnetic thrust ring. This thrust ring must not be subjected to impact, collision , or contact with other magnetic fields.
Remove it from the packaging before installation and keep it away from magnetic fields, such as those generated by electric motors or power tools.
When installing these bearings, observe the ABS warning light on the instrument panel during a road condition test to verify proper bearing operation.
1.8 Identify Magnetic Ring Side
For WHBs with an ABS magnetic thrust ring, to determine which side the thrust ring is on, bring a small, light object close to the edge of the bearing; the magnetic force generated by the bearing will attract it.
During installation, ensure that the side with the magnetic thrust ring faces inward, directly opposite the ABS sensor element. Note: Incorrect installation may cause the braking system to malfunction.
1.9 Apply Correct Grease Amount
Many bearings are sealed and do not require greasing throughout their entire service life. Other non-sealed bearings, such as double-row tapered roller bearings, must be lubricated with grease during installation. Since the internal cavity sizes of bearings vary, grease difficult to determine the exact amount of grease.
When it is excess, it will be pushed out by bearing’s rotation. Make sure that there is grease in the bearing. Normally, the grease quantity should be about half of the bearing’s internal clearance during installation.
1.10 Follow Torque Specifications
When installing the lock nut, pay attention to the torque . Different bearing types and bearing housings require different torque values. Please refer to the relevant instructions.
1.11 Minimize Contamination
Operate in a clean environment and keep the bearings clean. Even microscopic dust particles invisible to the naked eye can increase bearing wear, vibration , and noise if they enter the bearing.
1.12 Avoid Force & Impact
 Exercise care and precision during use and installation. Do not apply excessive force or impact pressure.
Do not strike the bearing directly with a hammer.
Do not transmit pressure through the rolling elements.
1.13 Use Specialized Tools
Use appropriate and accurate installation tools. Whenever possible, use specialized tools. Strongly avoid using materials like cloth or short fibers.
1.14 Prevent Sweat Corrosion
When handling bearings directly with your hands, thoroughly wash off sweat and apply high-quality mineral oil before operation to prevent the bearings from corroding. Pay special attention to rust prevention during the rainy season and summer.
1.15 Unpack Just Before Use
Do not open the inner packaging of the bearing until installation preparations are complete. This prevents prolonged exposure, which could allow various contaminants to enter the bearing.
2. Installation Tips for Wheel Bearing and Wheel Hub Assembly
2.1 Some Pre-Tips:
- Before installation, carefully inspect the machining quality of the mating surfaces of the shaft and housing, the end faces of shoulders, grooves, and connecting surfaces. All mating and connecting surfaces must be thoroughly cleaned, and burrs removed.
- During bearing installation, equal pressure must be applied around the circumference of the ring’s ring ‘s end face to press the ring into place.
- Do not use tools such as a hammer to strike the bearing end face directly, to avoid damaging the bearing . During pressing, ensure that the outer ring end face is pressed tightly against the housing shoulder end face, and the inner ring end face is pressed tightly against the shaft shoulder end face. No gaps are allowed.
- The axis of the installed bearing must coincide with the axis of the housing bore. When they do not coincide, i.e., deviate from the specified design accuracy, it will cause additional load on the rolling contact surfaces, easily leading to increased bearing noise and premature bearing failure.
- After correct installation, the bearing should rotate smoothly and flexibly, with no jamming or sticking phenomena.
2.2. For Gen1 Wheel Bearings
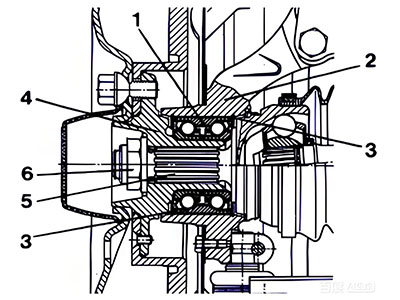
In the diagram : ① Gen1 wheel bearing, ② Flange plate seat hole, ③Retaining ring, ④ Wheel hub shaft, ⑤ Shaft or splined shaft, ⑥Lock nut
- When pressing the bearing into the housing hole using a press, ensure that the force is applied on the end face of the outer ring of the bearing.
- When pressing the bearing onto the hub shaft using a press, ensure that the force is applied on the end face of the inner ring of the bearing.
- Then, insert the shaft or splined shaft into the hub shaft, secure the shaft end with a lock nut, and implement effective anti-loosening measures.
2.3. For Gen2 Wheel Hub Bearings
 In the diagram: ⑦ Gen2 wheel hub bearing, ⑧ Shaft , ⑨ Lock nut
- When the bearing inner bore and the shaft have an interference fit, use a press to press the bearing onto the shaft (ensuring force is applied to the end face of the bearing’s inner ring). Then, tighten the shaft end with a lock nut to a specified torque and implement effective anti-loosening measures.
- When the bearing inner bore and the shaft have a clearance fit, place the bearing on the shaft. Then, tighten the shaft end with a lock nut to a specified torque and implement effective anti-loosening measures.
2.4. For Non-Shaft Riveted Gen3 Wheel Hub Bearings
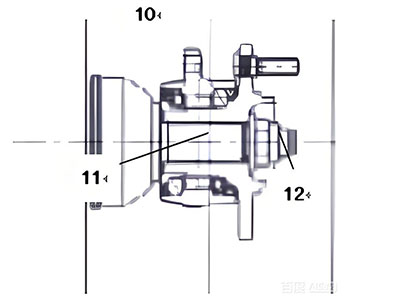
In the diagram: ⑩ Non-shaft riveted Gen3 wheel hub bearing, ⑪ Shaft or splined shaft, ⑫ Lock nut
- Place the bearing on the shaft.
- Then, tighten the shaft end with a lock nut to a specified torque and implement effective anti-loosening measures.
2.5. For Shaft Riveted Gen3 Wheel Hub Bearings
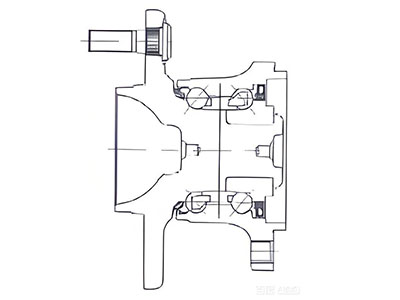
Directly connect the bearing to the brake component.
- In situations where a press is unavailable or cannot be used for installation, a fitting sleeve and a small hammer can be used to install the bearing.
- During installation, hammer blows must be transmitted through the fitting sleeve to the end face of the bearing ring.
- The hammering end face of the fitting sleeve should be made in a spherical shape. This ensures the hammering force is evenly distributed across the entire circumference of the bearing ring.
3. Common Error cases have to Avoid
3.1 Error case 1
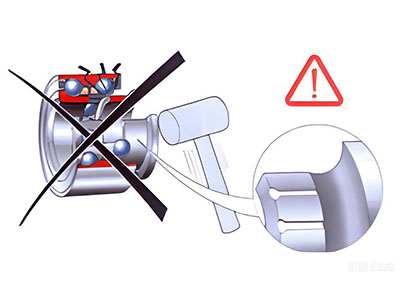
If the inner ring of the bearing separates from other components due to improper handling, do not attempt to reassemble it. If you try to do this, you will damage the inner raceway and seals, rendering the bearing unusable.
Striking the end face of the ring with a hammer or other tools will damage the steel balls and raceway, reduce the life or even lose the effectiveness of the bearing. the sharp tools touch the sealing end face of the bearing will scratch the sealing ring, may cause grease leakage, and eventually shorten the life of the bearing.
3.2 Error case 2
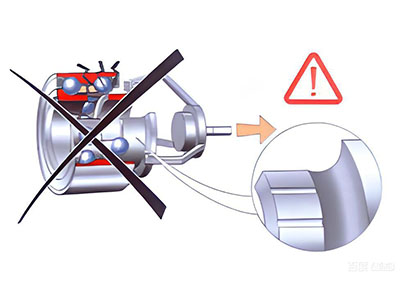 After installation, the application of external force to remove the inner ring, causing separation of the inner ring and the other parts of the bearing, will destroy the raceway and sealing ring, rendering the bearing unfit for further use.